

Mod Description
Do you want to add a bit of colour to you alloys or just want to protect them from those kerbs? Fit protectorsMod Details
PremiumNo Difficulty
 Mod ID855
Creditevilution
Cost££60ish
For
Mod ID855
Creditevilution
Cost££60ish
For


 Linkhttps://www.evilution.co.uk/mod/alloy-wheel-protectors.htm Copy to Clipboard
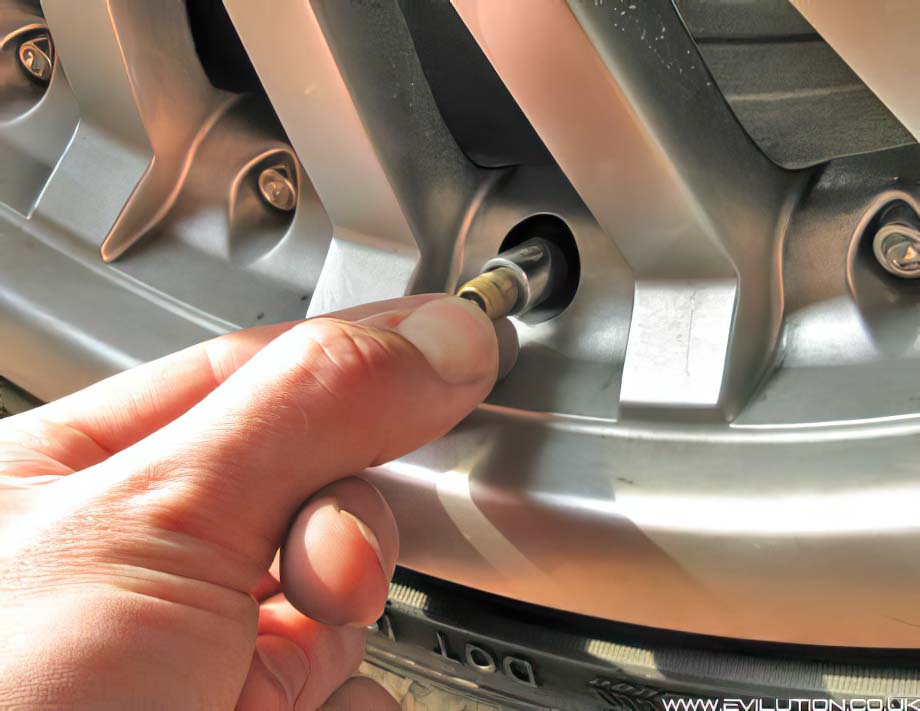
Jack up one wheel and let all of the air out of the tyre by pushing the valve centre in.
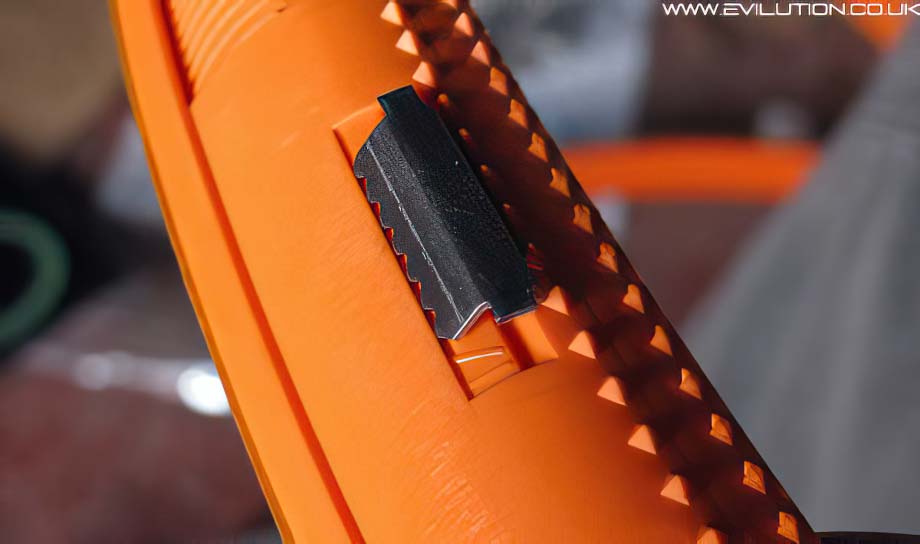
Locate the bag of clips and throw them all over the floor. Look at the indents and you will see that they start from 21 and go down to 13.
This represents the size of the alloy wheel, (the majority of smart alloys are 15″, some are 16″ and a few are 17″). Find your number (in this case 17), place a few dots of glue on the indent and push the clip in, serrated edge first as shown. When the clip is pushed in it will be flush with the plastic. Repeat with more of these clips in the specified locations. These are dependent and your alloy wheel size.
15″ wheels – serrated clip at: 13 & 15
16″ wheels – serrated clip at: 13, 15 & 16
17″ wheels – serrated clip at: 13, 15 & 17
18″ wheels – serrated clip at: 13, 15, 17 & 18
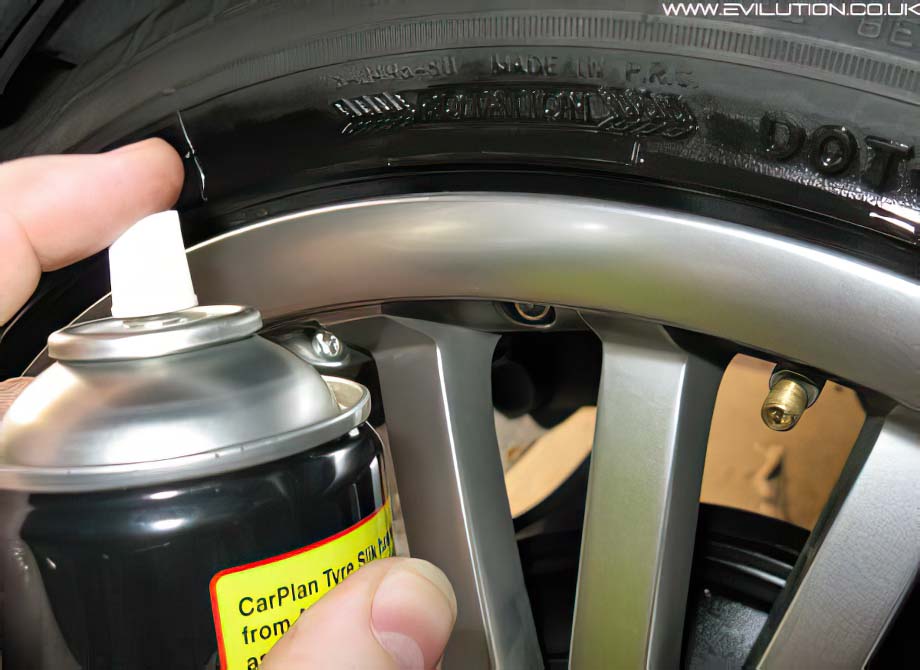
Spray mild soapy water or something similar around the edge of the tyre.
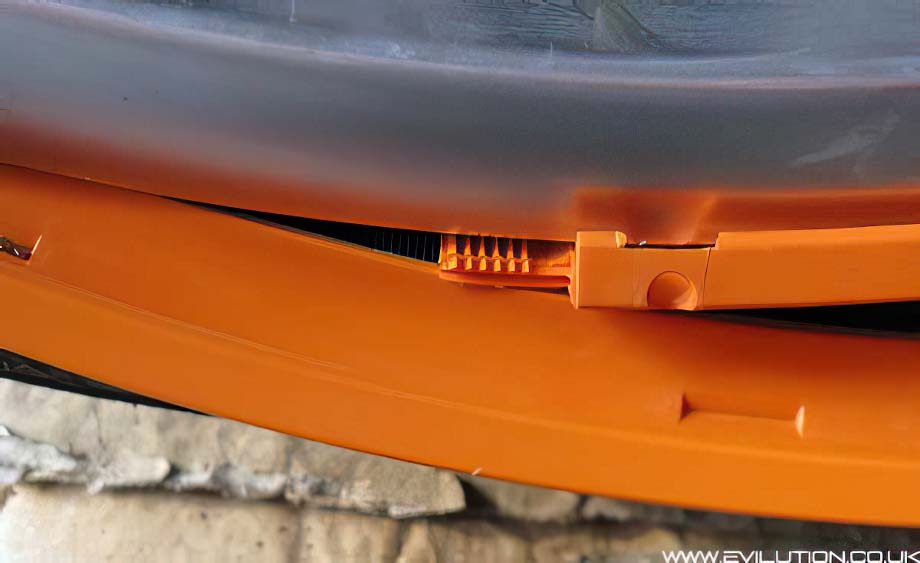
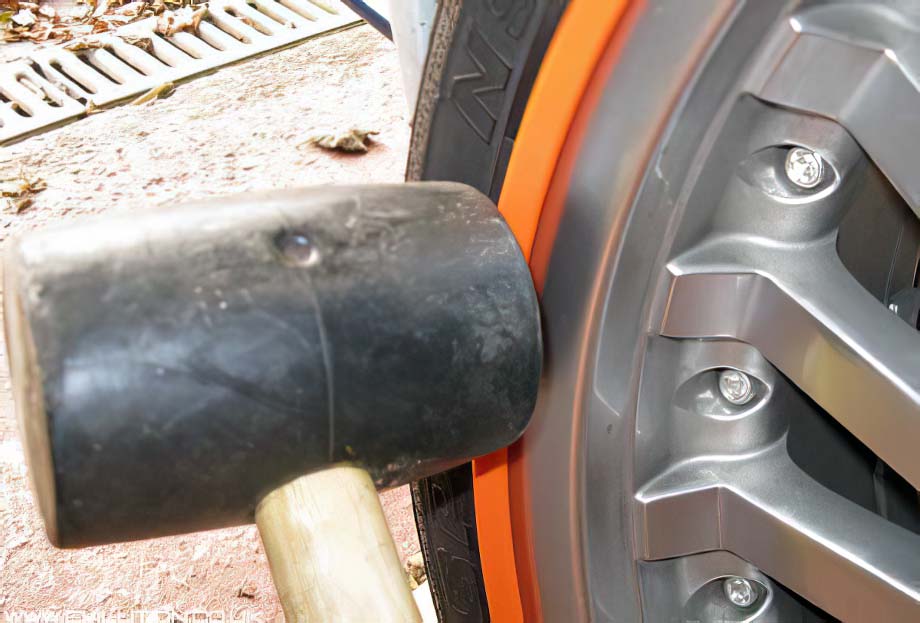
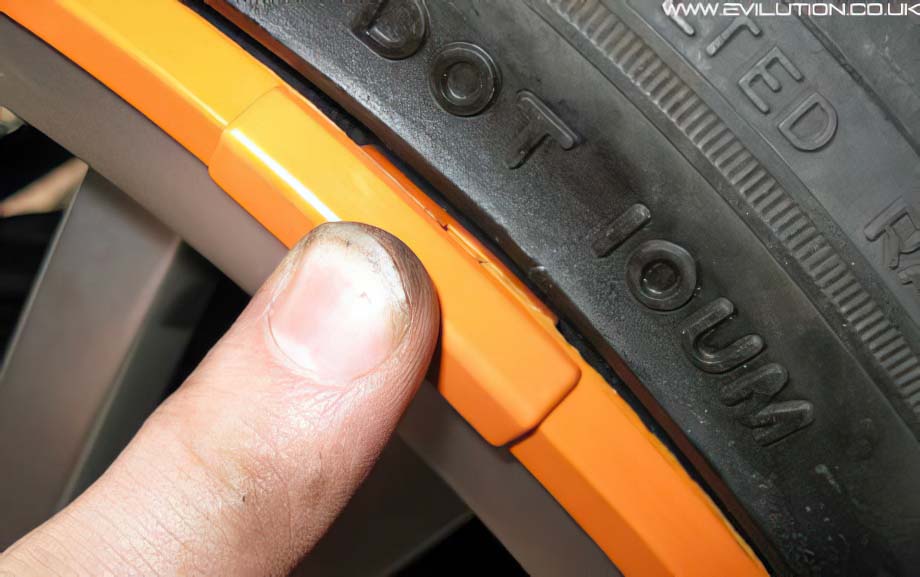
Place the edge with the tab in between the tyre and the alloy wheel and hammer it in with a rubber mallet. Work all the way around the protector until you get back to the beginning.
Don’t be shy with that rubber hammer.
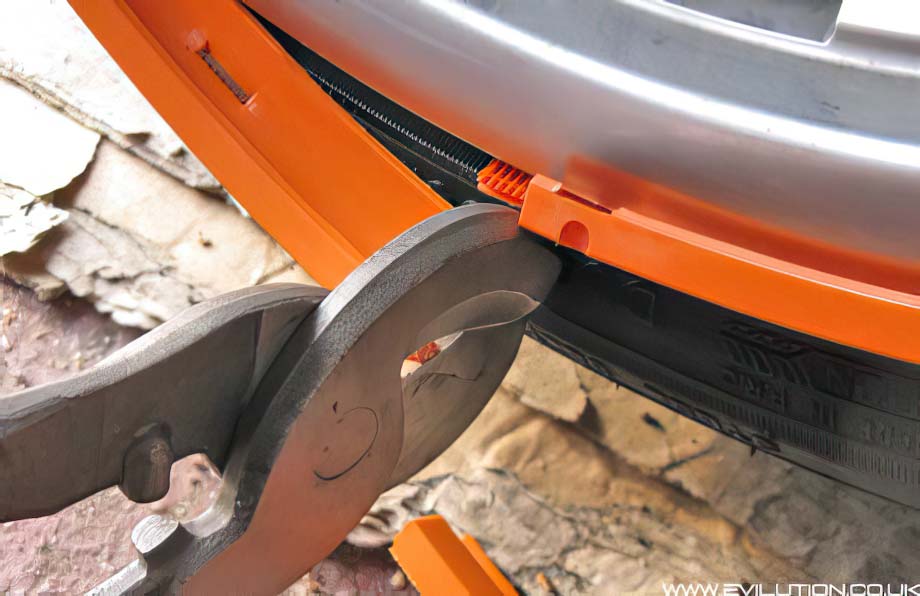
When you have made it all the way around make a mark on the protector where it lines up with the last tooth. Take some secateurs or cutters and…
…cut the excess off.
Apply glue to the teeth of the rim protector…
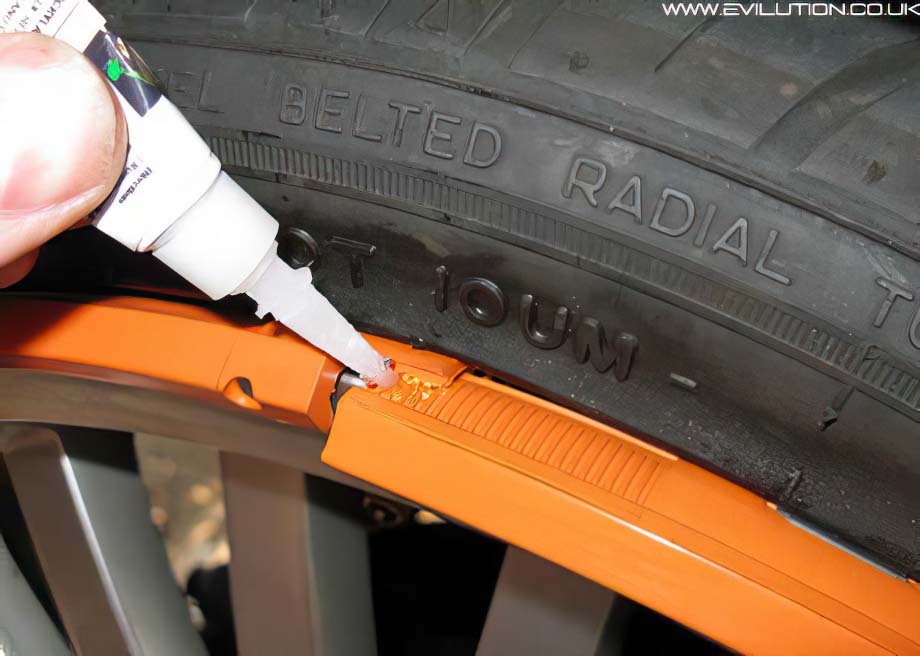
…and hammer it in as before.

Pump the tyre up to about 15 PSI and go around the protector a few more times with the rubber mallet. The extra pressure allows the protector to grip a bit better. Then pump the tyre up to the correct value as shown on your fuel filler flap. Go round a few more times with the rubber mallet.

Once the protector is flush (0.5mm to 1mm) from the alloy wheel, take a cover strip, add a few blobs of the supplied glue…
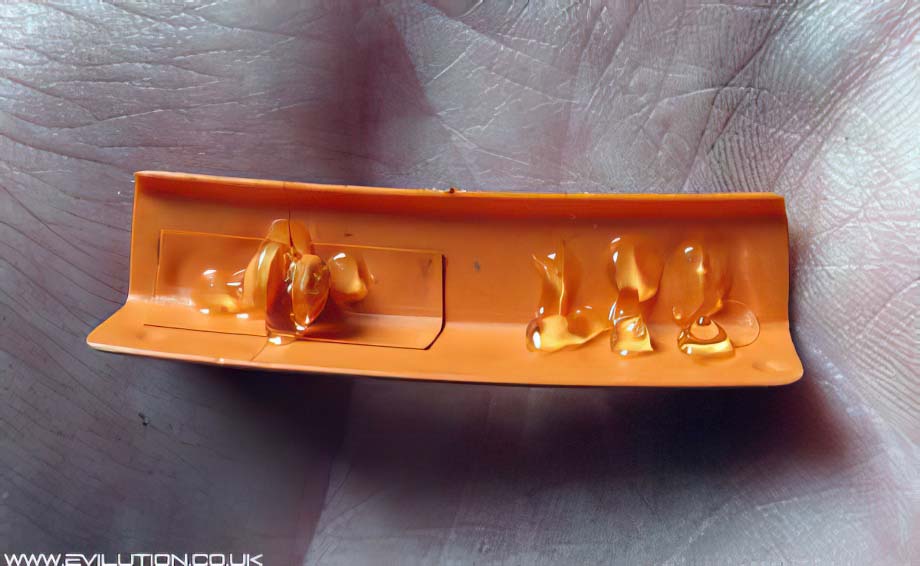
…and push it in place to complete fitment. Repeat on the other 3 alloys.
Stand back and marvel at the touch of colour and protection you have just added.
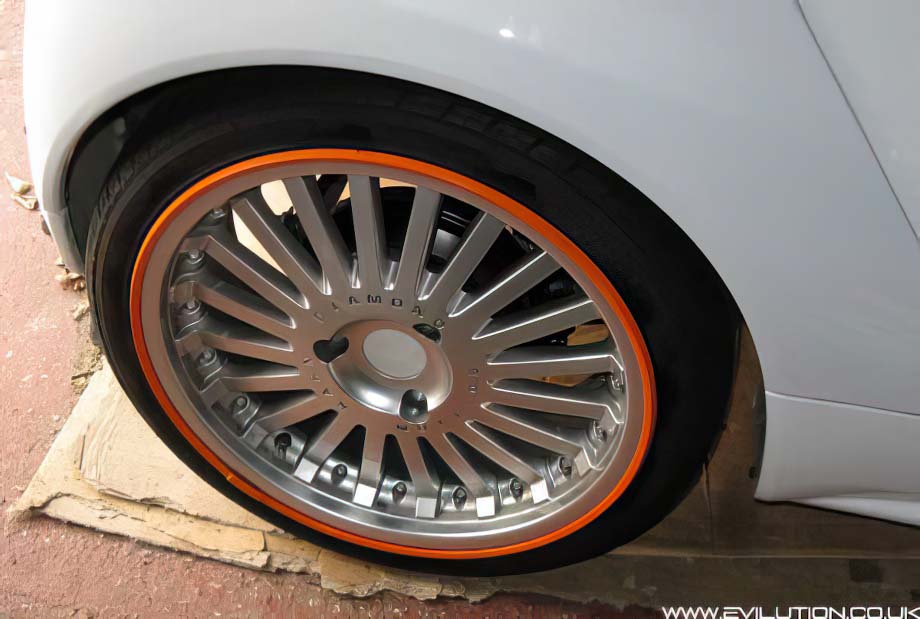
Then go and have a shower because it is tiring hammering these in. They are a tight fit but they have to be to stay in place. They do not come off whilst driving or even if you drag them down the kerb.
Where Can I Buy These?
These particular ones are sold on the SmartMods site in a range of colours.
Official Fitting Instructions
Can be seen here. Fitting video
How Effective Are They?
Very effective indeed, check out the video below. Also, if you do kerb them they are very easy to debur to make them look nearly good as new again.
This is what one looks like when the driver hits the kerb at 40mph.
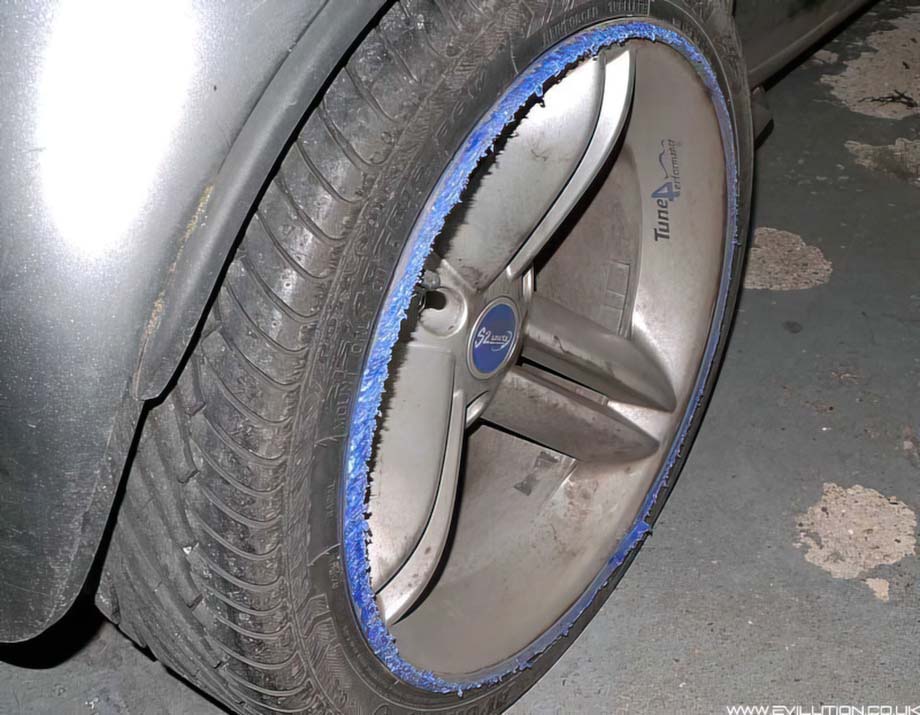
It stayed in place and there was no damage to the alloy wheel underneath.