Mod Description
Swap your pads over for something a bit better.Mod Details
PremiumYes Difficulty
 Mod ID279
CreditEvilution
Cost£ï¿½35+
For
Mod ID279
CreditEvilution
Cost£ï¿½35+
For Linkhttps://www.evilution.co.uk/mod/450-brake-pad-change.htm Copy to Clipboard
Special Tools
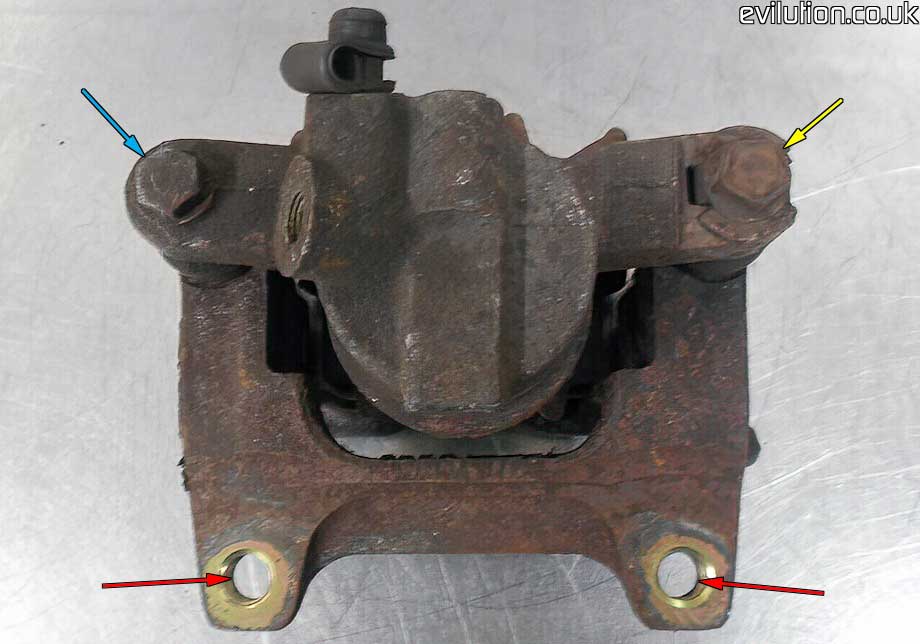
There will always be someone on a forum somewhere claiming that you need a pentagon (5 sided) socket when doing the pads or changing the discs. They are talking out of their bum. The pentagon bolt is the hinge pin that you rotate the calliper piston housing on when you fold it down to access the pads. There is no need to loosen or tighten this bolt .
Blue – 13mm hexagon bolt. Removed to pivot the calliper down.
Yellow – Pentagonal bolt. Lower pivot bolt. Doesn’t need removing.
Red – Caliper to hub mounting points,
Removing The Brake Pads
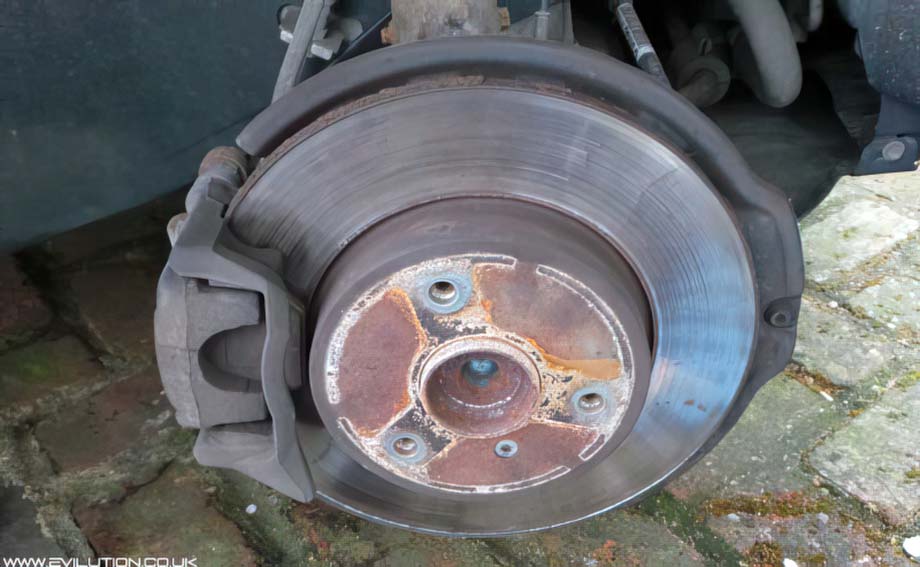
Remove the front wheel on one side at a time to reveal the brake calipers.
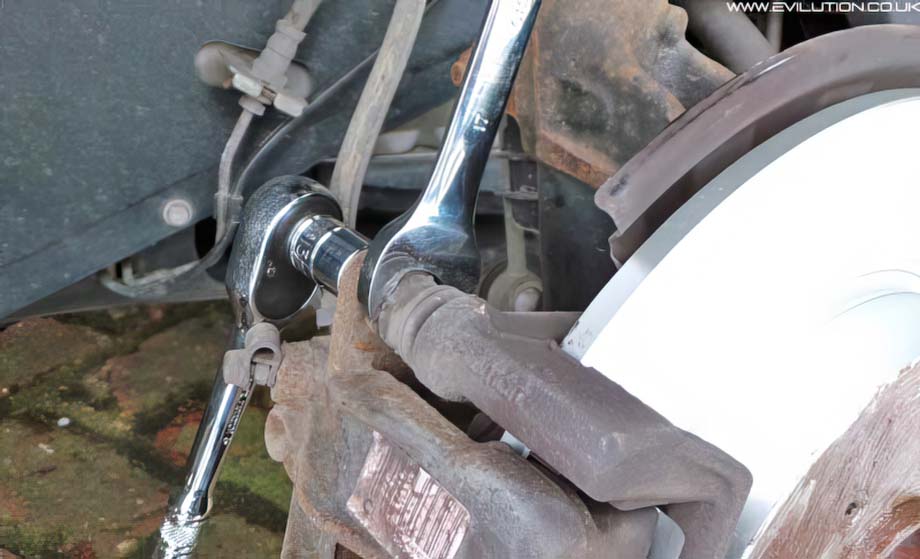
Use a 13mm spanner to undo the top bolt on the back of the caliper frame. You may need to hold the other side of the bolt receiver with a 17mm spanner to stop it spinning.
32Nm on refitting.