

Mod Description
If you have broken one, have a leak or want to tint them, take them out and fix it.Mod Details
PremiumYes Difficulty
 Mod ID447
CreditEvilution
For
Mod ID447
CreditEvilution
For Linkhttps://www.evilution.co.uk/mod/450-rear-window-leaks.htm Copy to Clipboard
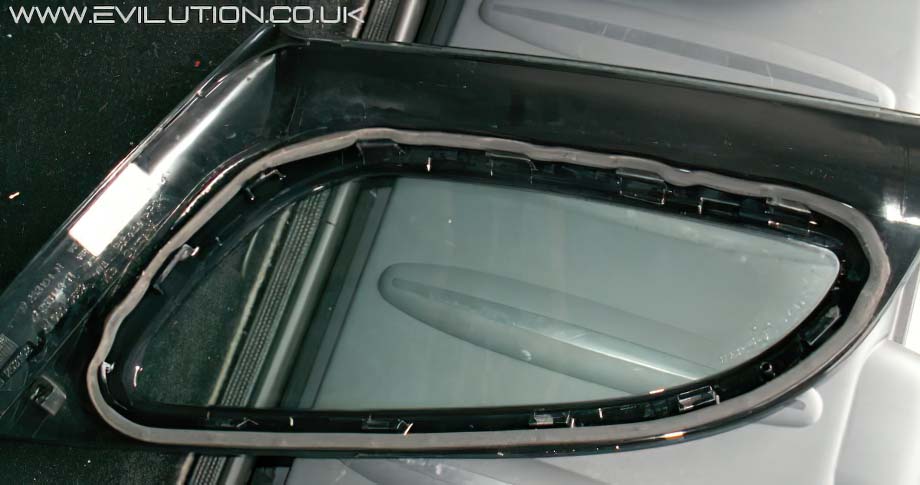
My Rear Side Plastic Windows Leak
It’s quite a common problem, usually down to a damaged foam seal. Follow the instructions below and check the foam seal for damage. Clean both parts and repair or replace the foam seal if needed. You can easily recreate these foam seals using sticky backed foam seals, This sort of product can be bought from a good builders merchant.
You can use 2 layers of the replacement foam strip or, if the original strip is too flat, you can add a layer on top of the original foam strip to bulk it out. Alternatively you can do a search for closed cell foam strip.
Although the idea of bonding the windows back in with silicone sounds like a good idea, make sure you get it right because if you don’t, you won’t get them back out again. It’s a bodge that even I don’t recommend. Silicone sealant isn’t a good choice anyway.
On cars, it is recommended you use polyurethane adhesive like Tigerseal.
Alternative To Silicone Sealant
Mark R contacted me to say that he had resealed his rear quarter windows using a product called Plumber Mait (non setting putty). It’s a non setting putty designed to stop water ingress. Because it doesn’t set it means that the windows can be removed at a later date.
The drawback is that it doesn’t come in a tube so you either have to apply it by hand or try to pipe it.
Alternative To Plumbers Mait
There’s a product called Captain Tolley’s Creeping Crack Cure. It’s designed for boats, caravans etc. It has a low viscosity so it creeps into hairline cracks and sets.