

Mod Details
PremiumNo Difficulty
 Mod ID1806
CreditG 33
For
Mod ID1806
CreditG 33
For
 Linkhttps://www.evilution.co.uk/mod/453-rear-speaker-fitting.htm Copy to Clipboard
Before your starting this mod you need to know 3 things.
It’s not the full system, is just some hack. The original system has a JBL amplifier under the seat, the subwoofer in the boot and all the cables available. I have just installed the rear speakers.
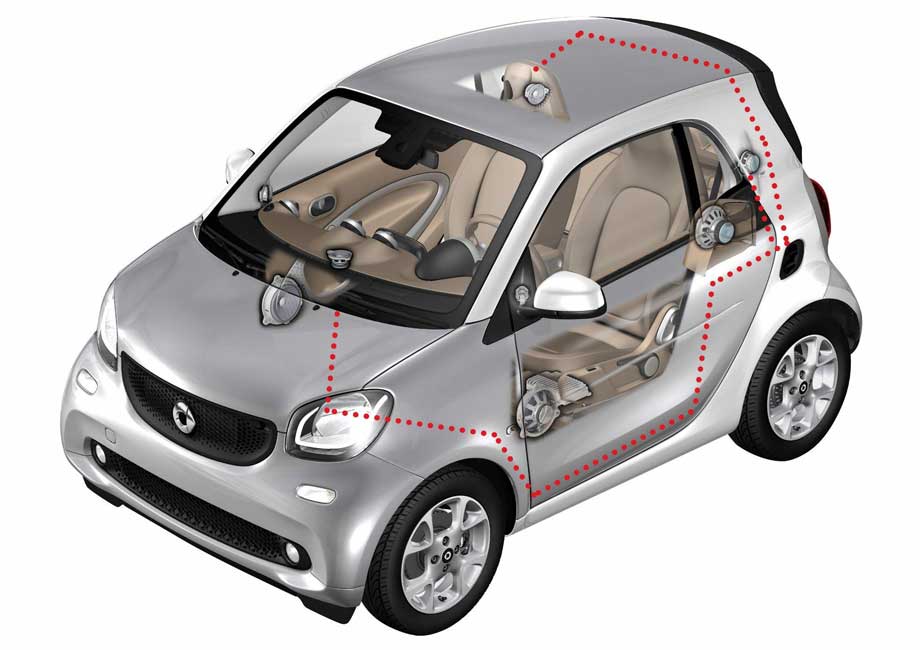
The purple circle are the front speakers, you will already have the OEM front speakers fitted but you can change them.
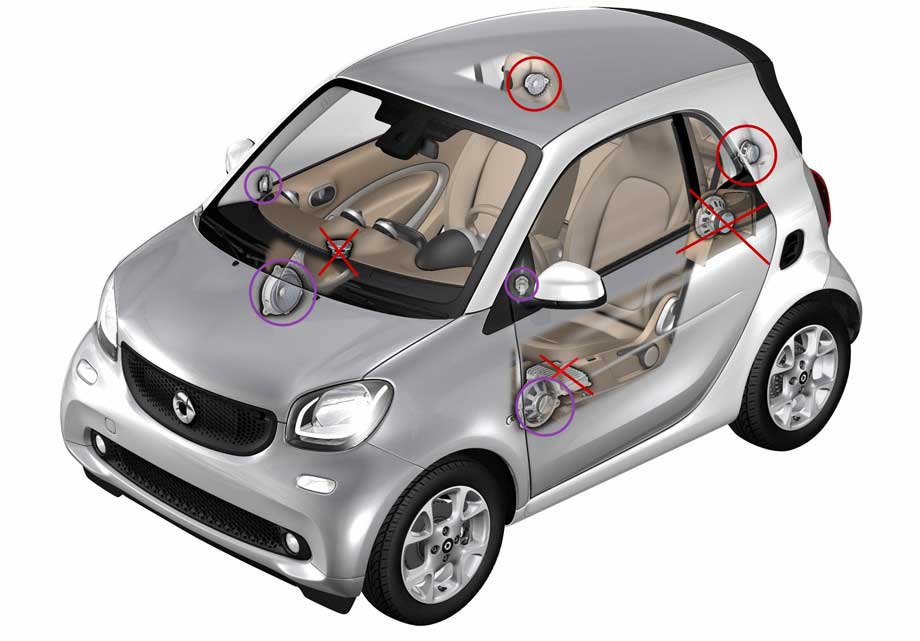
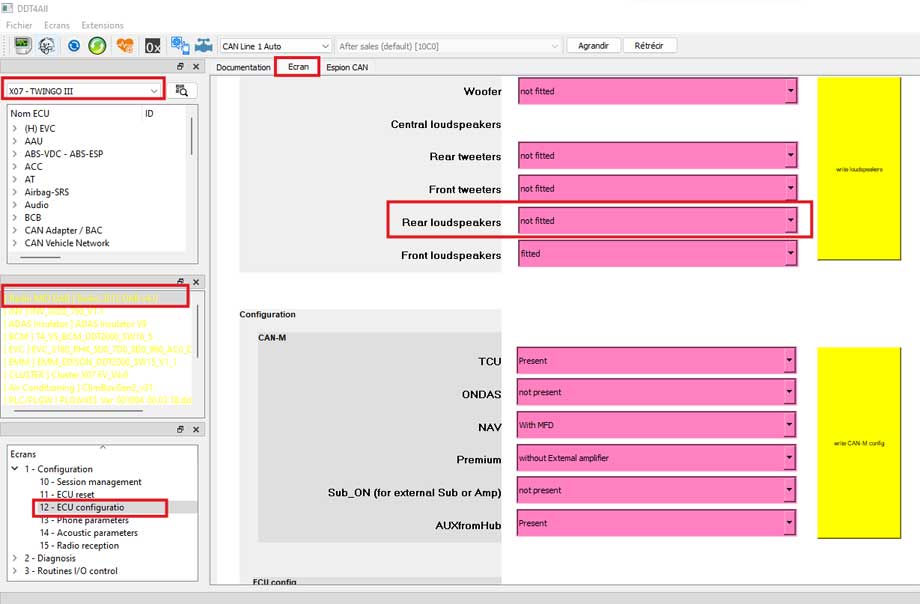
If your car does not have the rear speakers, the cables are not present in your car. You need to add your own cables and code the option on the multimedia system with DDT4ALL.
Parts You Need From Smart
Rear left and right speakers are the same. A4538270160 you need to buy two.
Speaker bracket left. A4535450740
Speaker bracket right. A4535450840
Some standard nuts and screw you can find them on your local hardware store.
6 nuts (3 per bracket) sorry i have forget this information.
4 screw (2 per speaker) => 0,5cm diameter.
Some speaker cable. 10 metres should be fine.
4 car connector to connect the cable to the speaker. I have not found the original connector. Amazon is your friend
Tools
A soldering iron
Some plastic remover tools for the soft plastic
Torx screw
A cutter
Power cable tools
You need to code the option with DDT4All so you need your computer, DDT4All and the Renault library.
Before your starting i recommend to you see this videos and tutorial
For remove the smart media system (r-link)
https://www.youtube.com/watch?v=HAi8EUmD0P8
To see more datils on the removing the rear covers
https://www.youtube.com/watch?v=PRizh6Z-Gu4
For the cable of the speakers : (Fortwo & Forfour 453 – Tomtom R-Link Screen)
Remove the smart media system to check if you have the same connector as me without cable.
Reconnect the touch screen and all wires and after enabling the option with DDT4ALL.
Follow other tutorials and youtube videos to see how.
Find an old little speaker or unmount a tweeter if you already have one.
Use a length of cable to connect this speaker to the media system put the cable inside the connector. After that put the music on, you should hear some sound. If you do not have sound, check the option with ddt4all.
If is a succes is good news, you can now buy all you need.
I have started the mounting, with the right speaker, and left, passing the cable on the conductor side, removing some parts of the door seal to do that), under the steering wheel and under the media system. I hope you had a little hand.
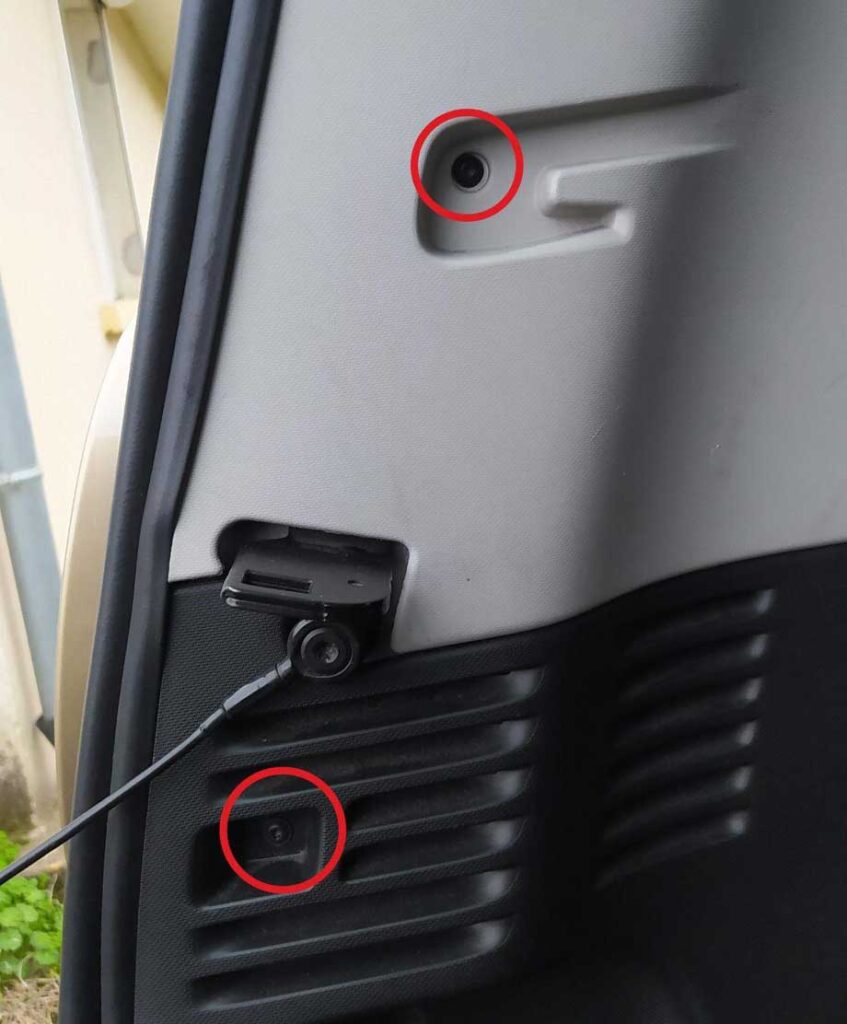
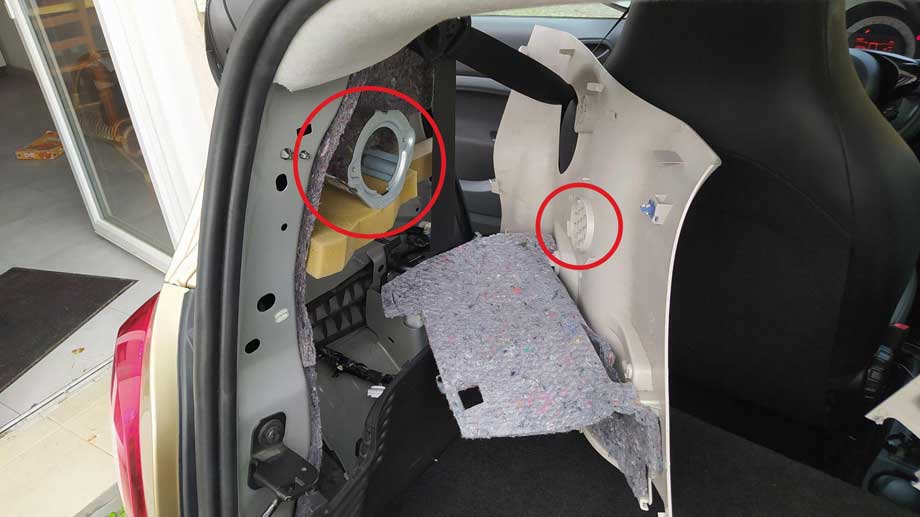
Remove left and right rear cover. Remove this screws for right…
…and left.
Pull off the boot seal and remove the side panels.
After that you can use one speaker and…
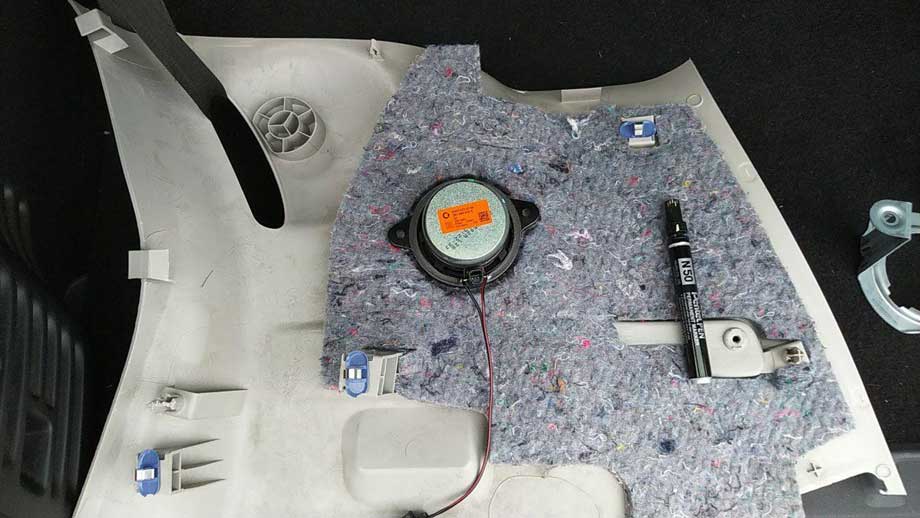
…draw a guide before cutting the sound deadening…
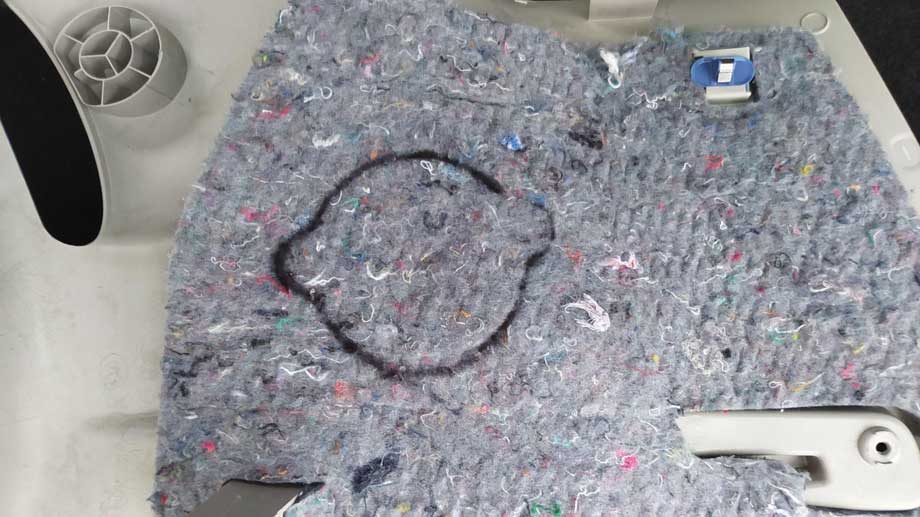
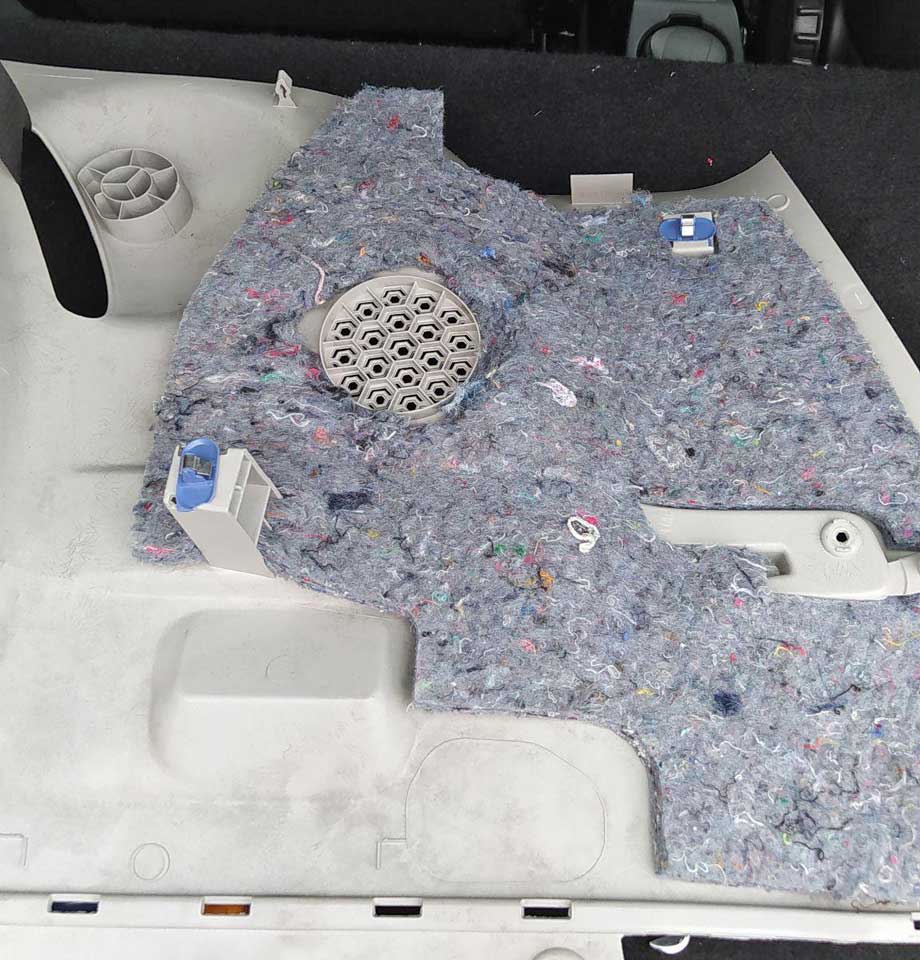
…to unveil the speaker hole.
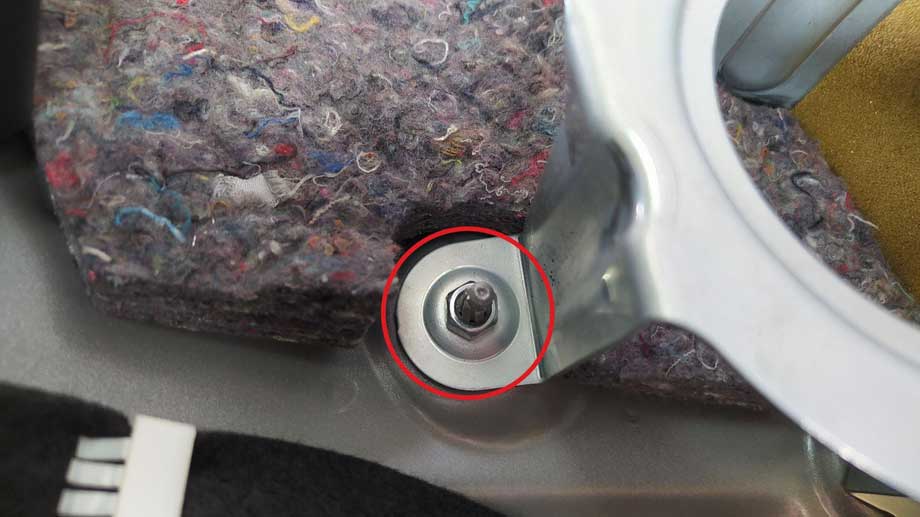
After that you can mount the left and right bracket. You need to use the nuts x3 per bracket. Repeat the operation to right side is the same.
Although not necessary, I would recommend putting a rubber spacer between the car and the speaker bracket.
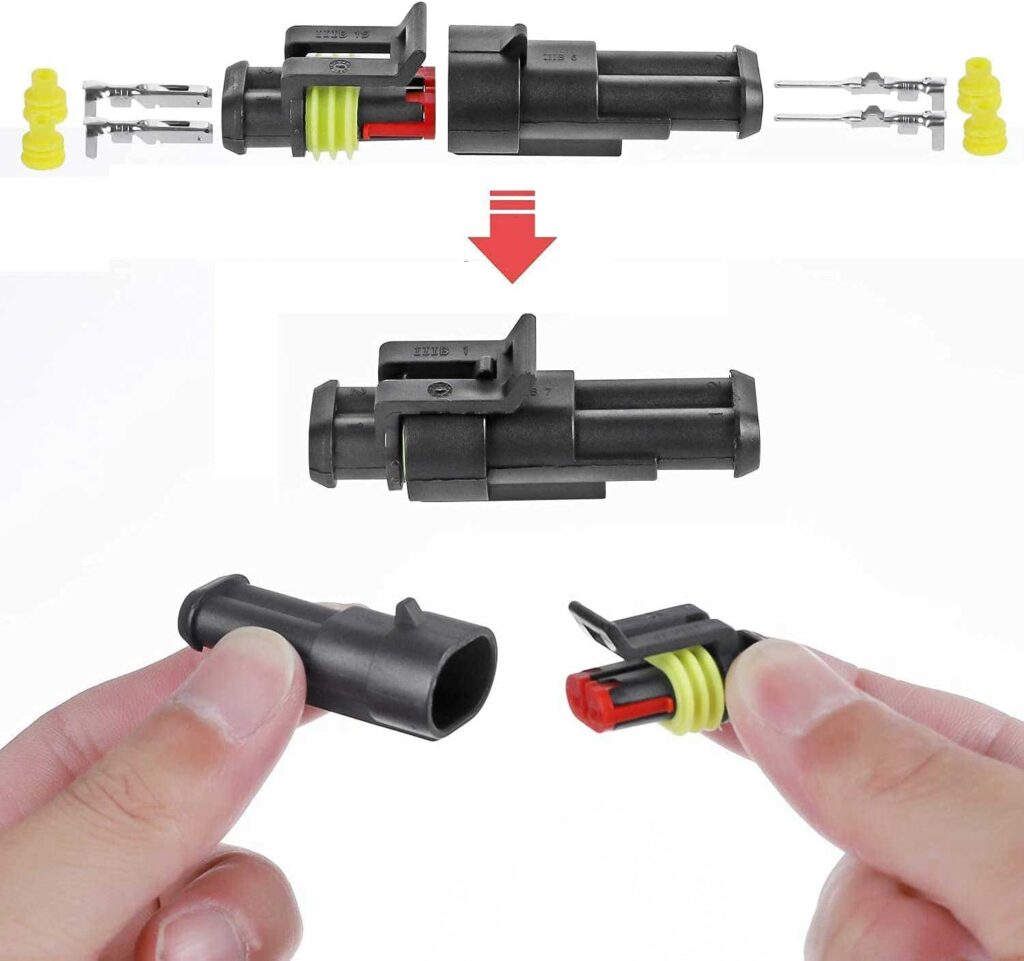
You can now cable the speakers. I have used some SuperSeal connectors (available on Amazon).
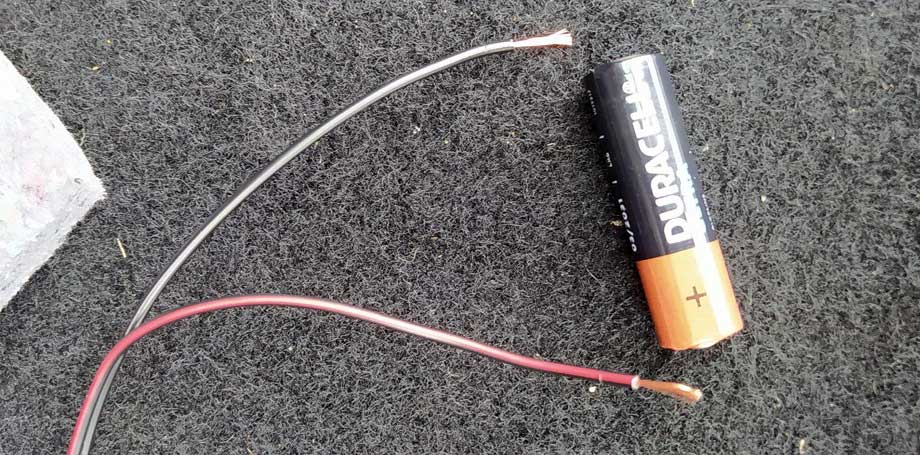
Red is positive, brown is negative.
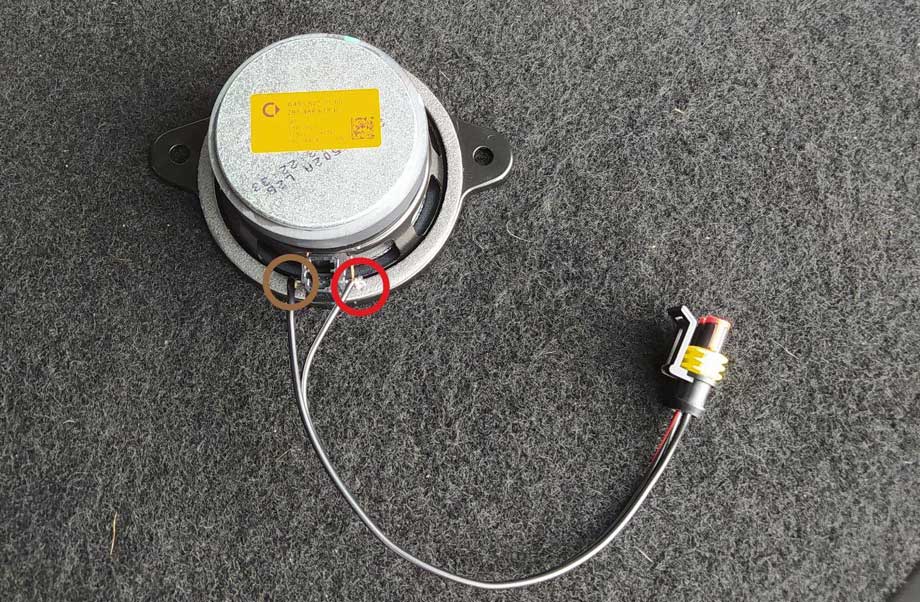
I recommend you check the correct positive and negative on your own speaker. To do that you need a simple battery connecting the wires to the speakers and the battery. If your speaker goes UP you have to find the + and – connector, if your speaker goes down you need to invert the polarity of the wires.
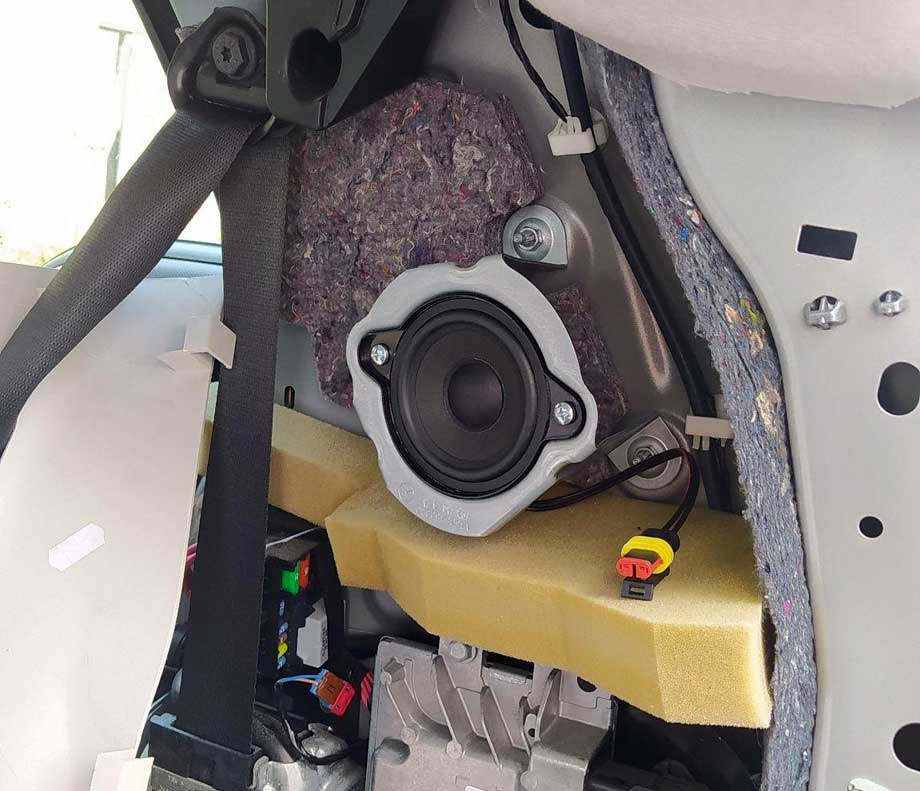
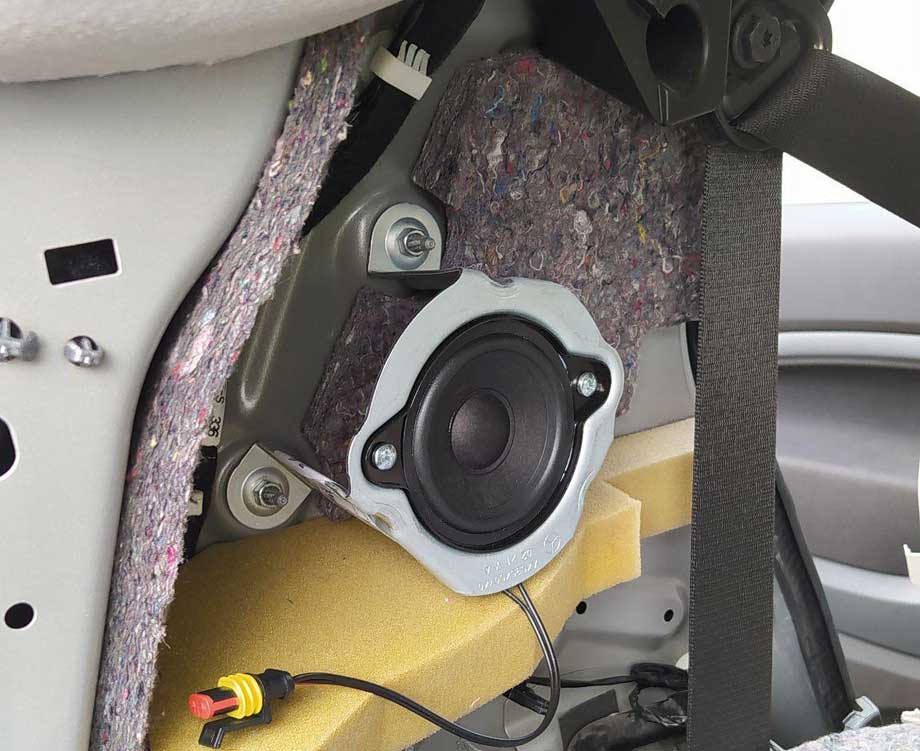
After that you can now mount your speaker.
Right speaker

Left speaker
Now the cable step.
Start from the right speaker.
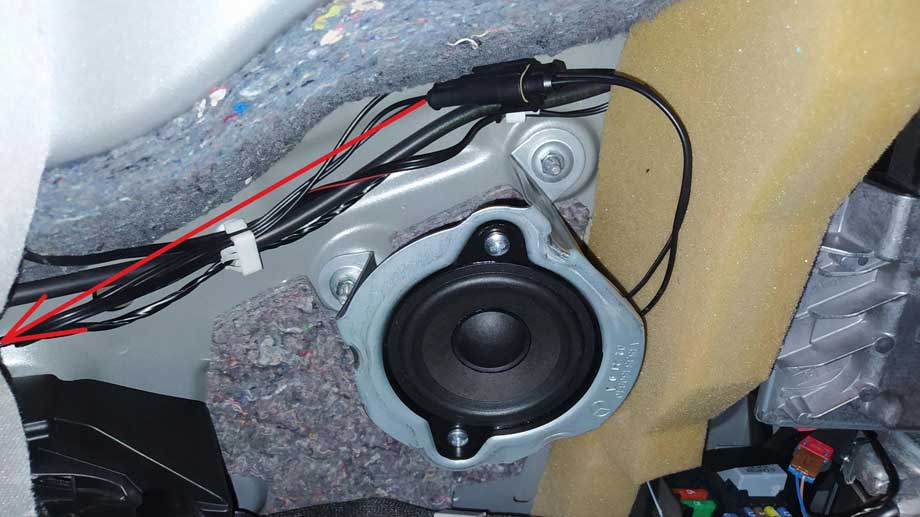
Run the wire either over the top (under the headliner) or under the carpet. Route the cables to get to the left hand speaker.
That way you are running both speaker cables down the same side of the car.
That just saves time having to route wires down both sides of the car.
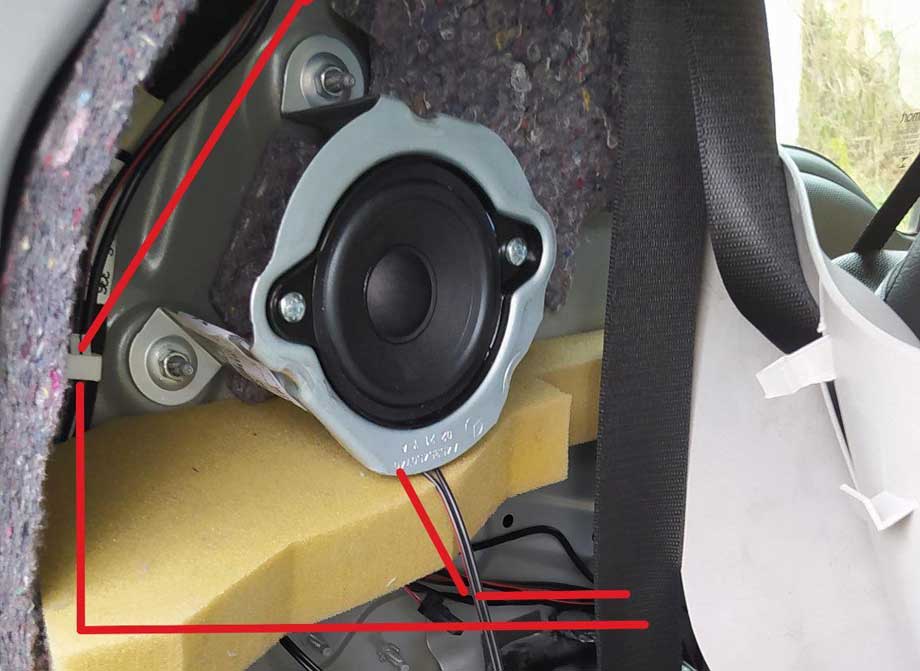
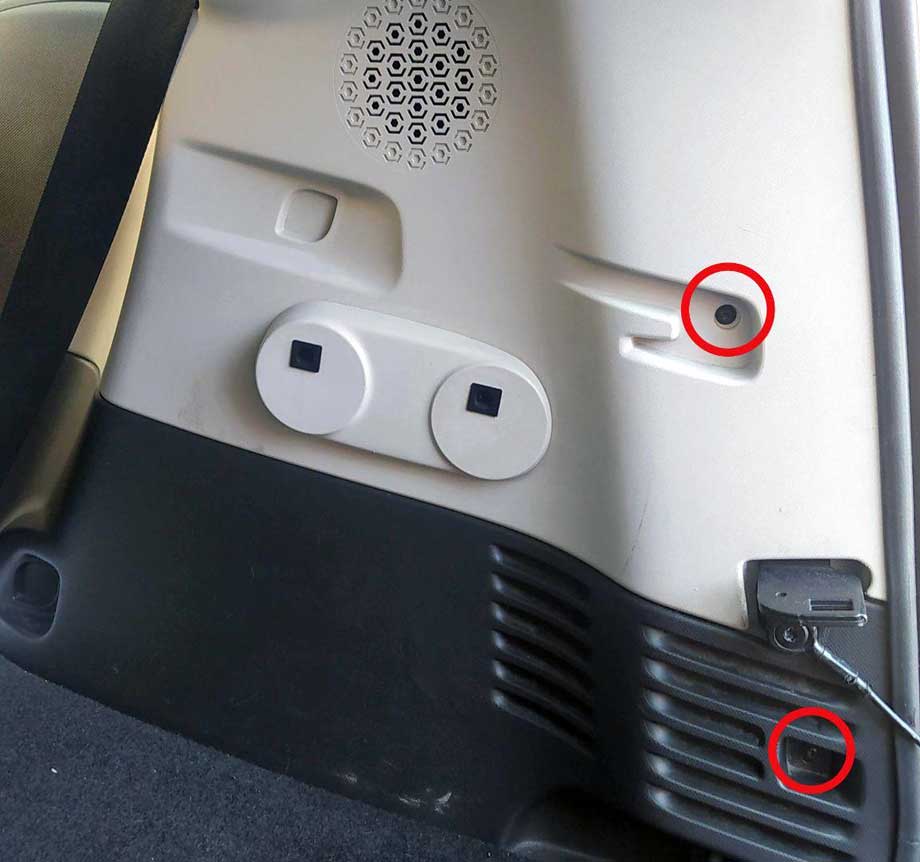
The blue circle is the boot light connector. The green circle is the connector for the reverse sensor buzzer.
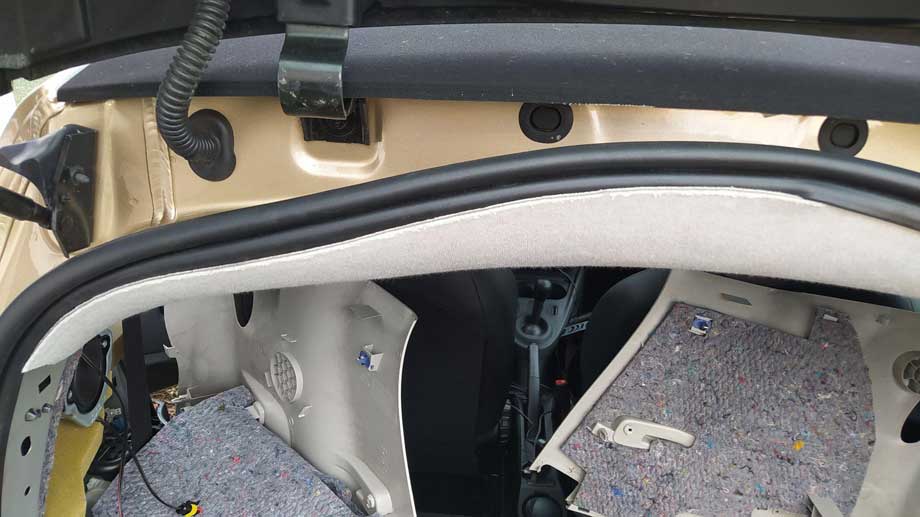
Run the cables from behind the trim…
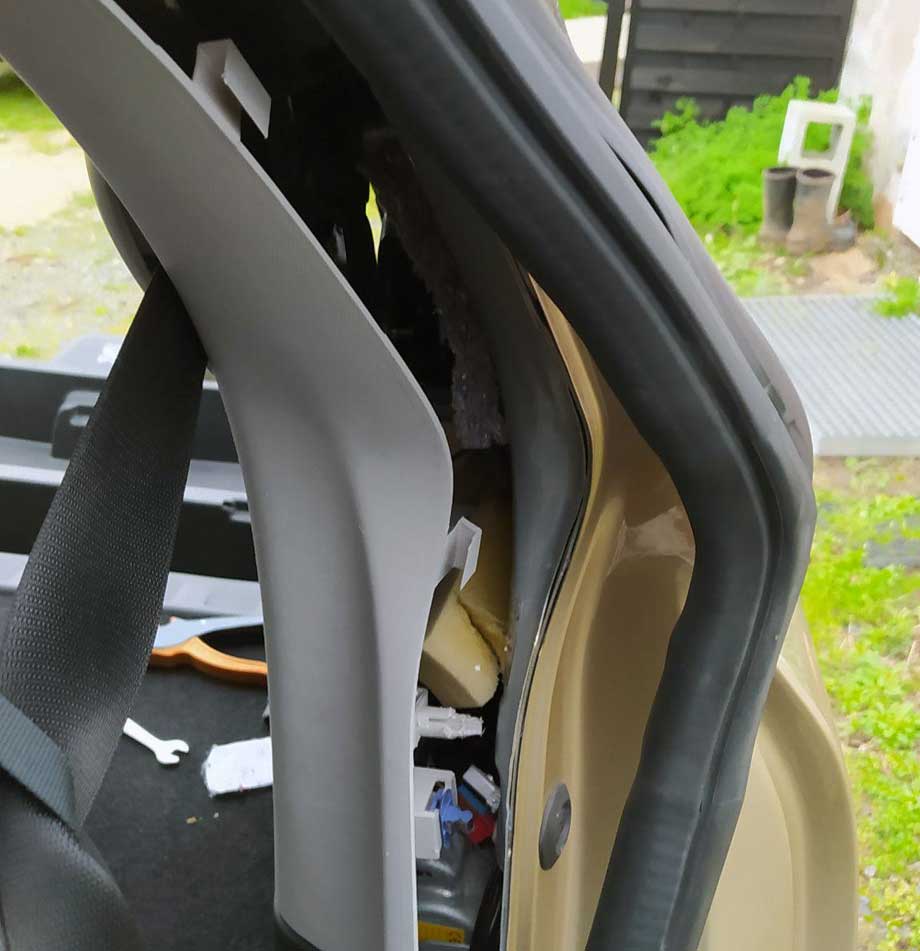
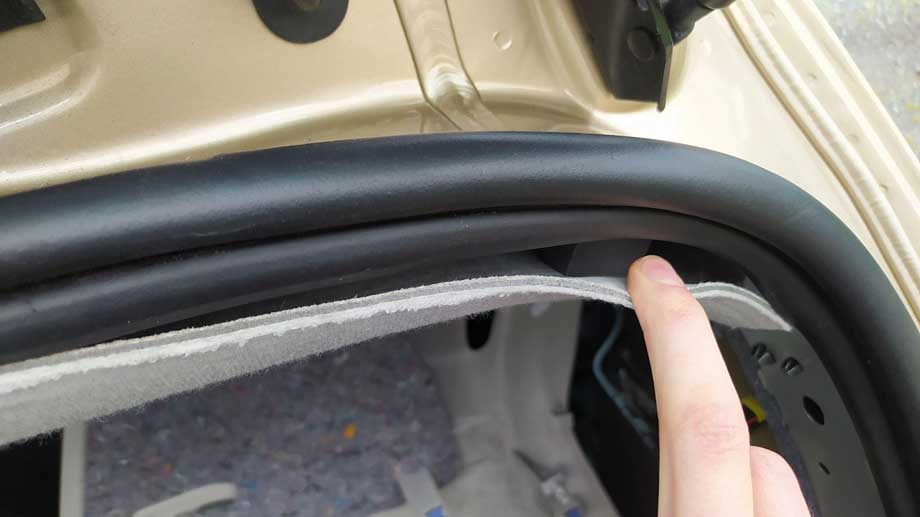
…and down beside the seat. Remove the door seal…
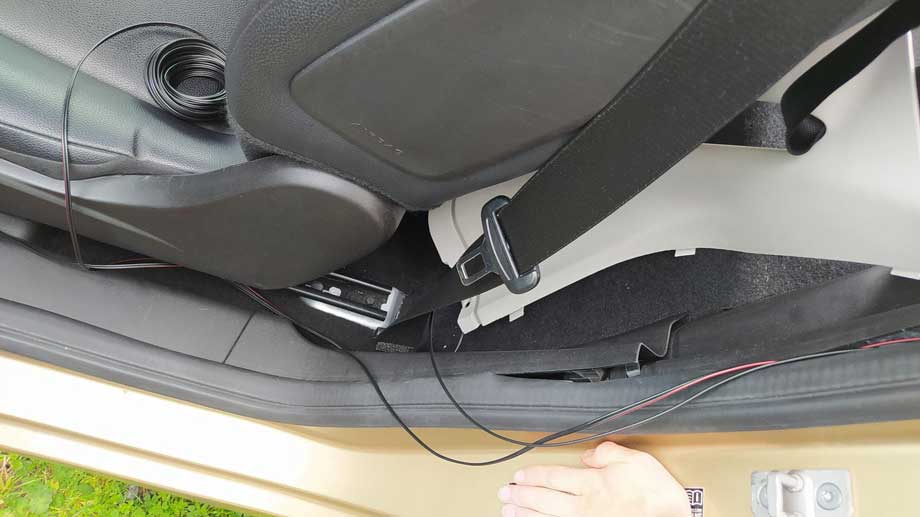
…as that gives you room to run the cables.
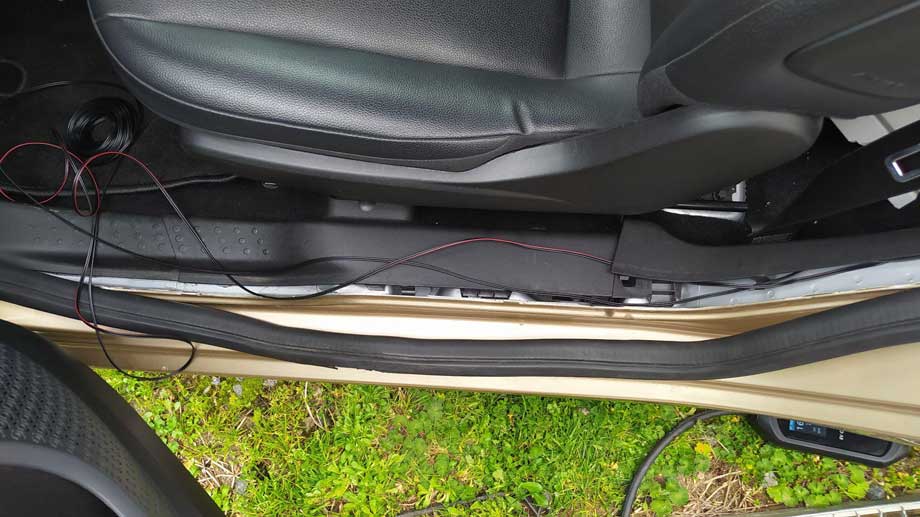
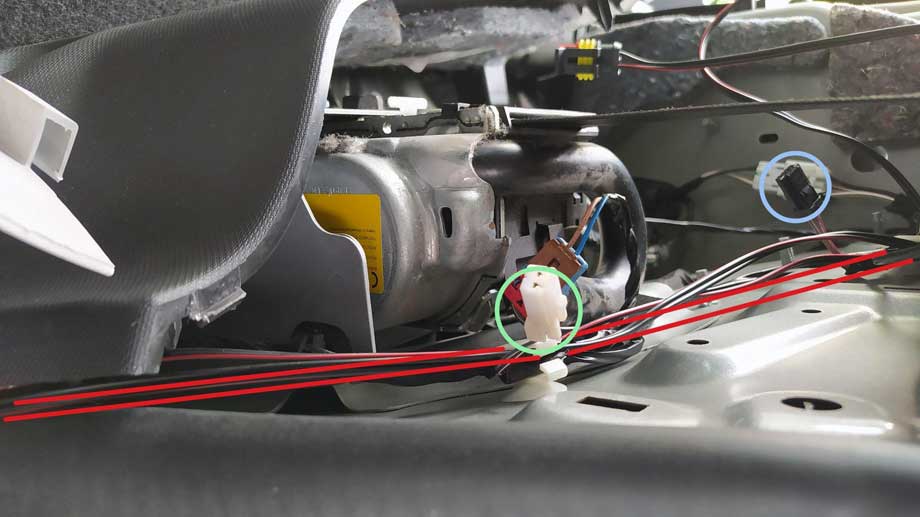
When you get to the front, run the cables up and across to the underside of the dashboard. The yellow circle is the obd connector.
It helps to tie the cables together.
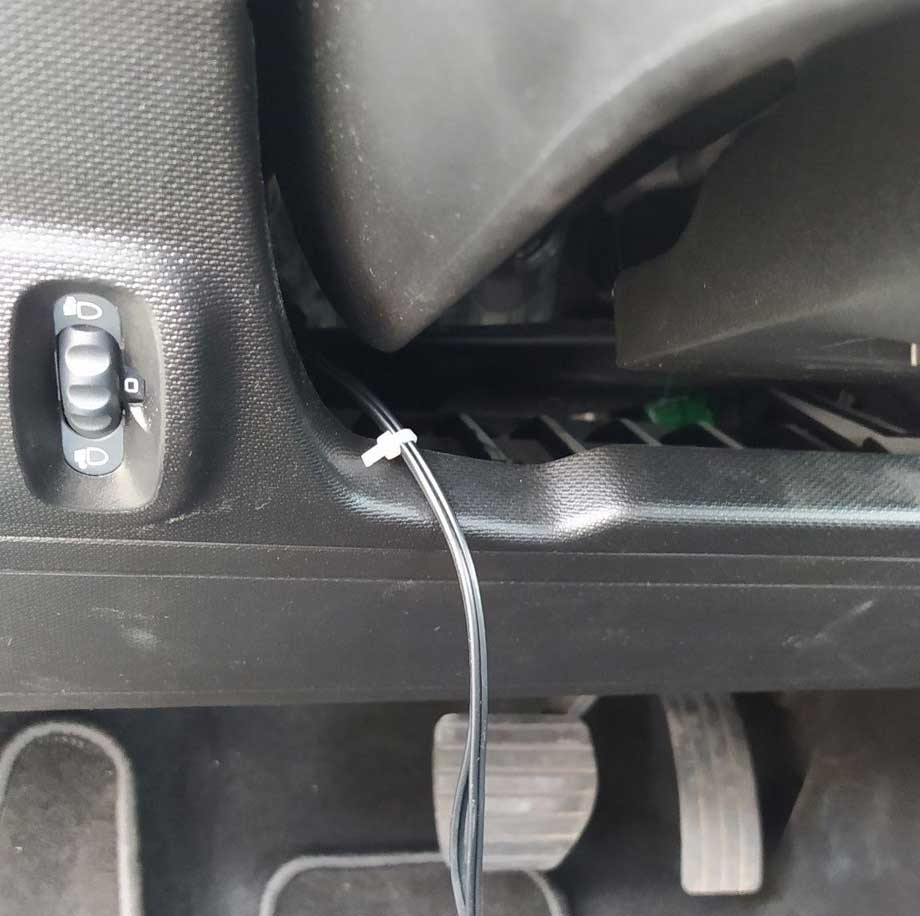
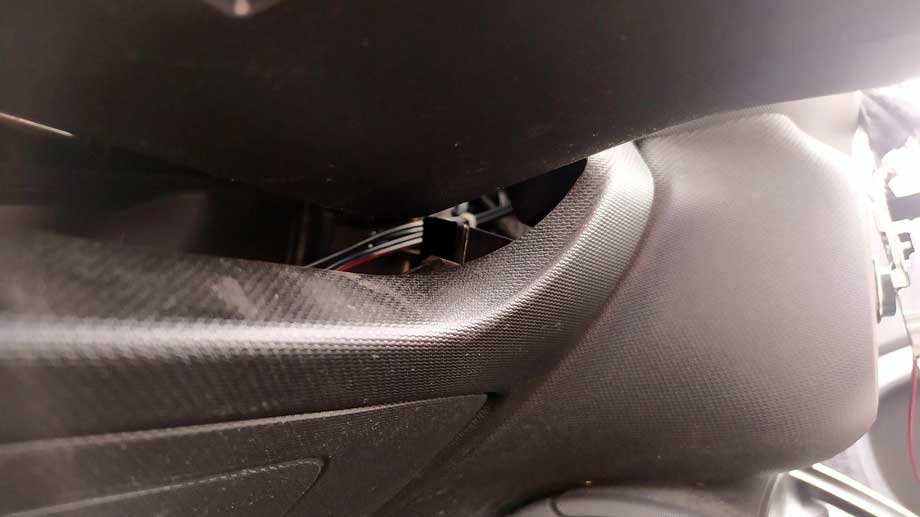
Run the cables across underneath the dash and…

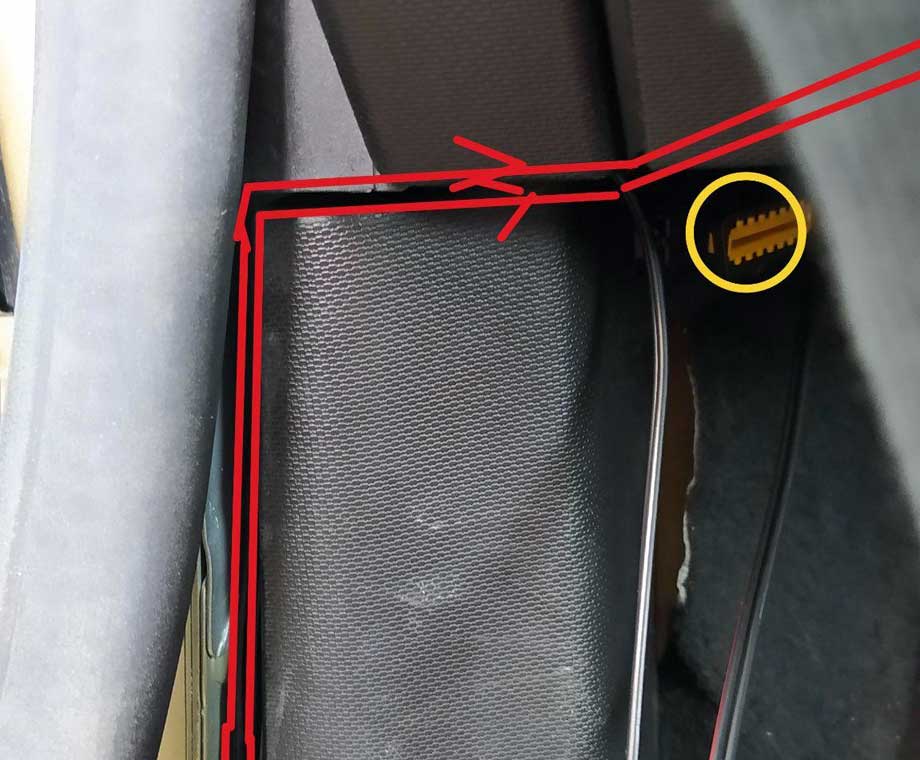
…up behind the stereo.
Now you can put the amazon car connectors onto your two wires to the + positive and – negative wire to respect the correct connection.
I used terminals from a connector from a salvage smart 453 however, they look like TE Connectivity MQS female terminals so do a search to see if they match.
You need 4 little wire 2 per Amazon connector 1 for each speaker

After that you need to plug the little connector inside the existing car connector at the right place !
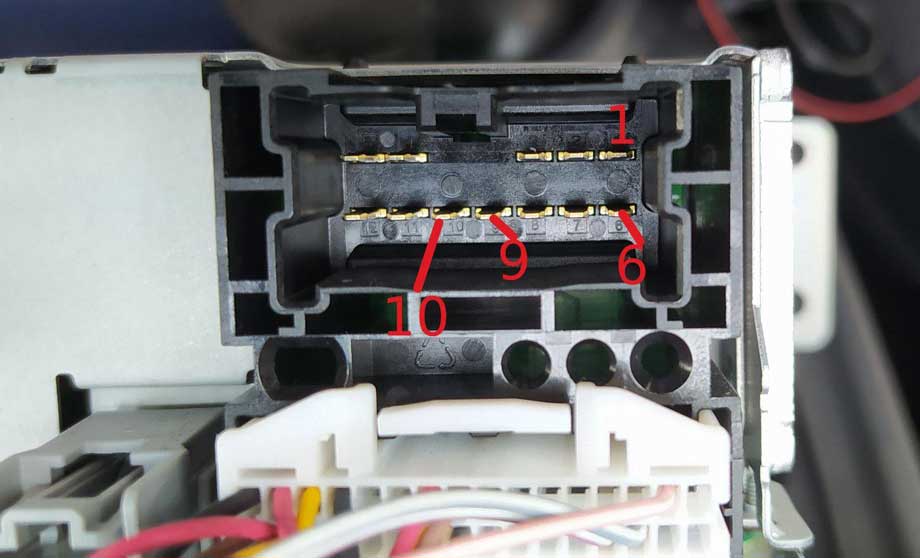
After that you are ready to plug the connector.
1 = Left Rear Speaker +
6 = Left Rear Speaker –
9 = Right Rear Speaker +
10 = Right Rear Speaker –
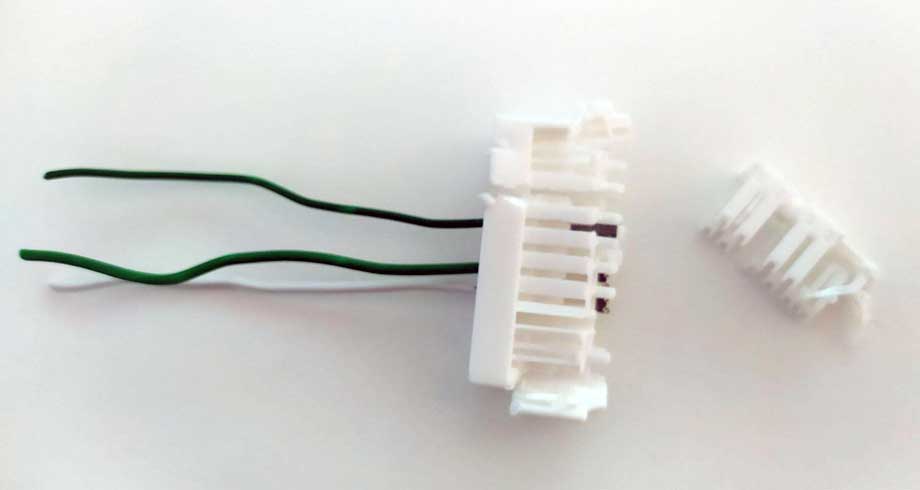
Before inserting the little connector inside the white connector, remove the white connector of the smart media system.
After that you need to move the little clip of each side of the white connector (dont remove, just move 3mm to unlock the wires)
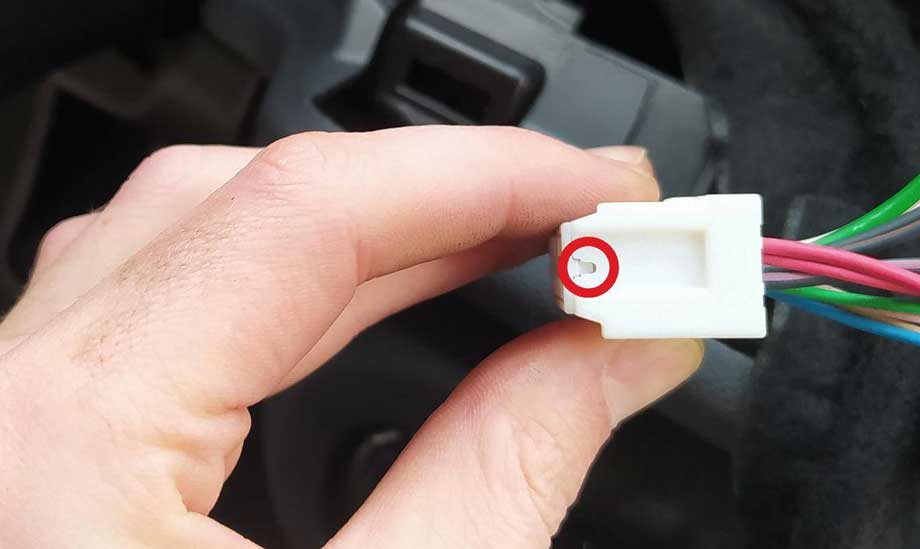
After that plug in the little wire inside the correct slot and push back the lock system.
Connect the white connector to the smart media system.
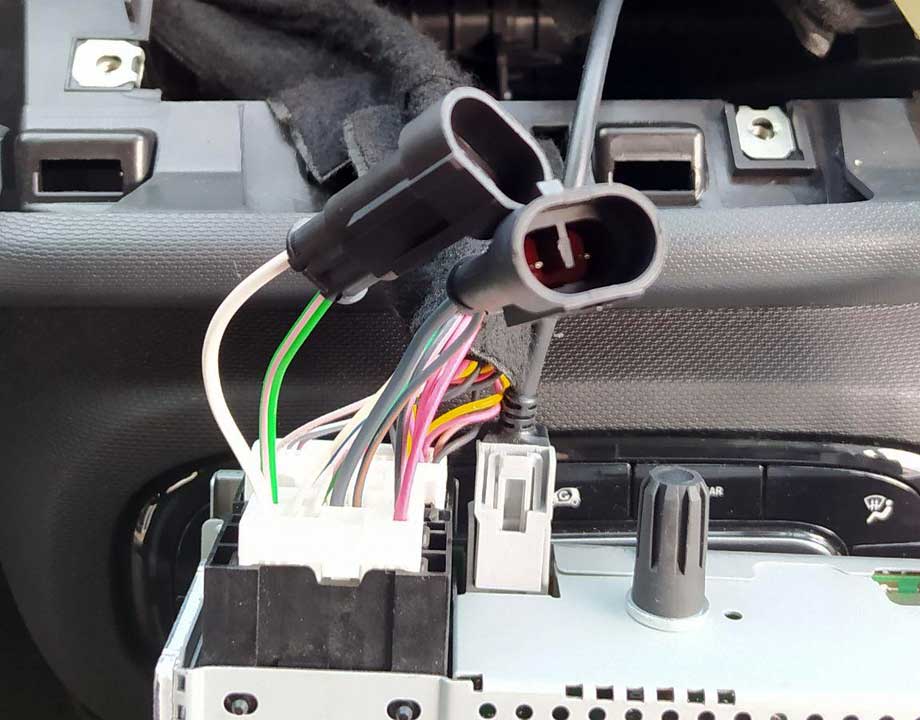
Plug your amazon connector between them and plug the touch screen to try !
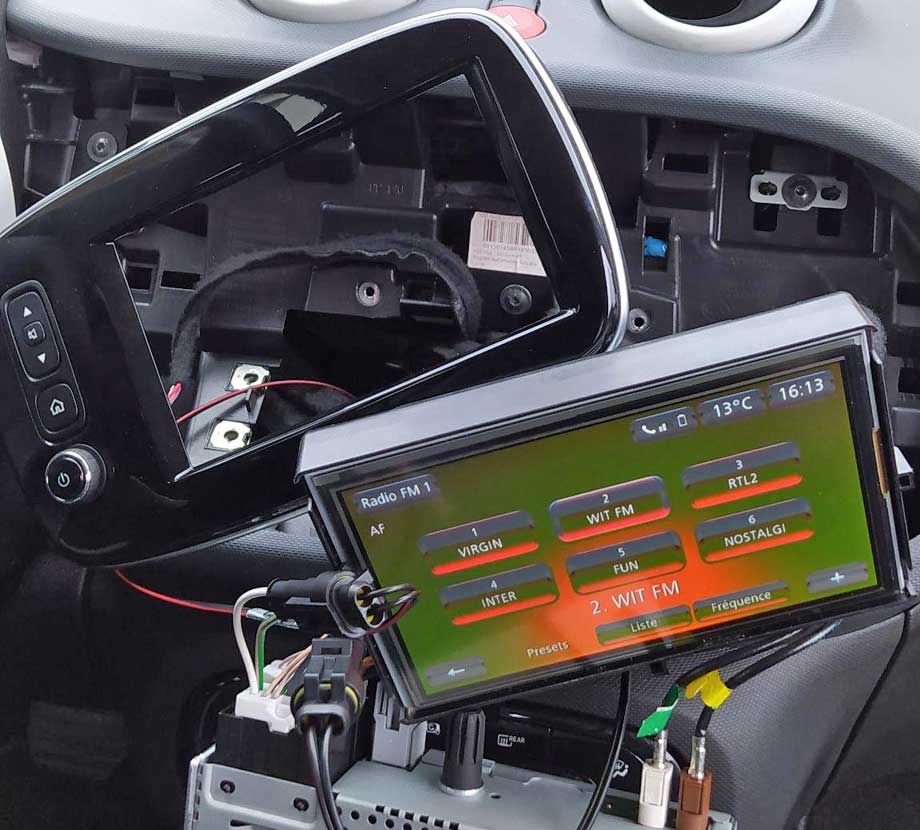
After that you can now replace all elements. It is done!
Alternative Speaker Mounts
If you have a 3D printer, you can print 1 of the 2 options shown on this page – click.