

Mod Description
I'm not going to go into every detail of fitting as the fitting instructions are very good.Mod Details
PremiumNo Difficulty
 Mod ID595
CreditEvilution
For
Mod ID595
CreditEvilution
For Linkhttps://www.evilution.co.uk/mod/x-gauge-fitting.htm Copy to Clipboard
Download the X-Gauge Installation Guide
Page 11 section 7.1 the instructions say ‘guide the two 3-wire cables of the module through the opening at the bottom of the housing’.
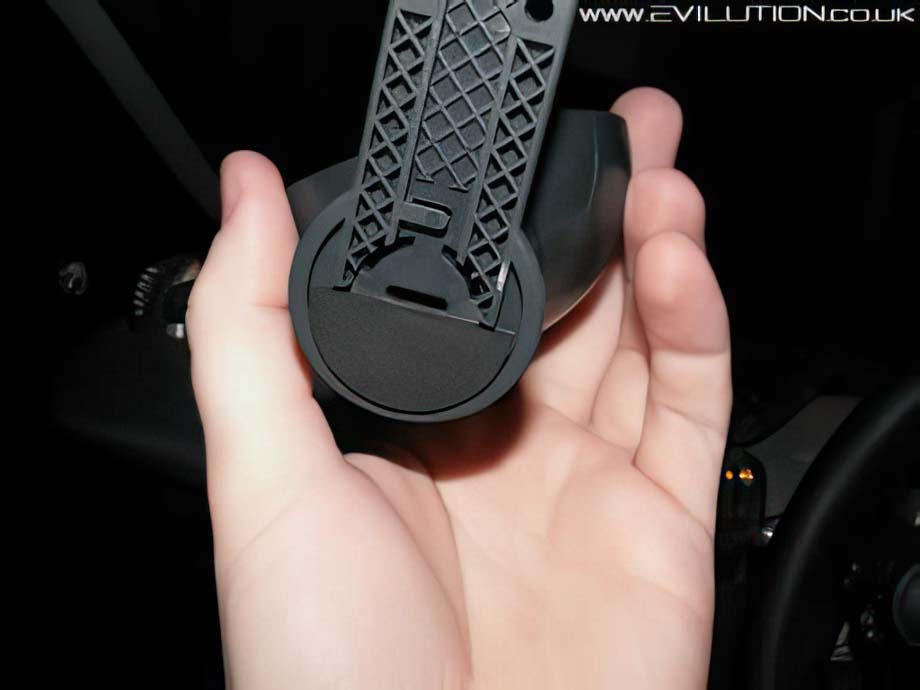
I don’t know if pods differ, but on mine the hole in the bottom of the pod was too small for the 2 OBD pins to pass through.
All I did was to jab a screwdriver into the slot and open it up, you can drill the hole if you wish, it won’t be seen when finished.

Page 12 section 7.3 tells you how to clip the module in place. I had to give it a scary amount of force to get it to clip in. I was worried it was going to break but it didn’t at all. I’m not sure how easy it would be to remove as you can’t see the clips.
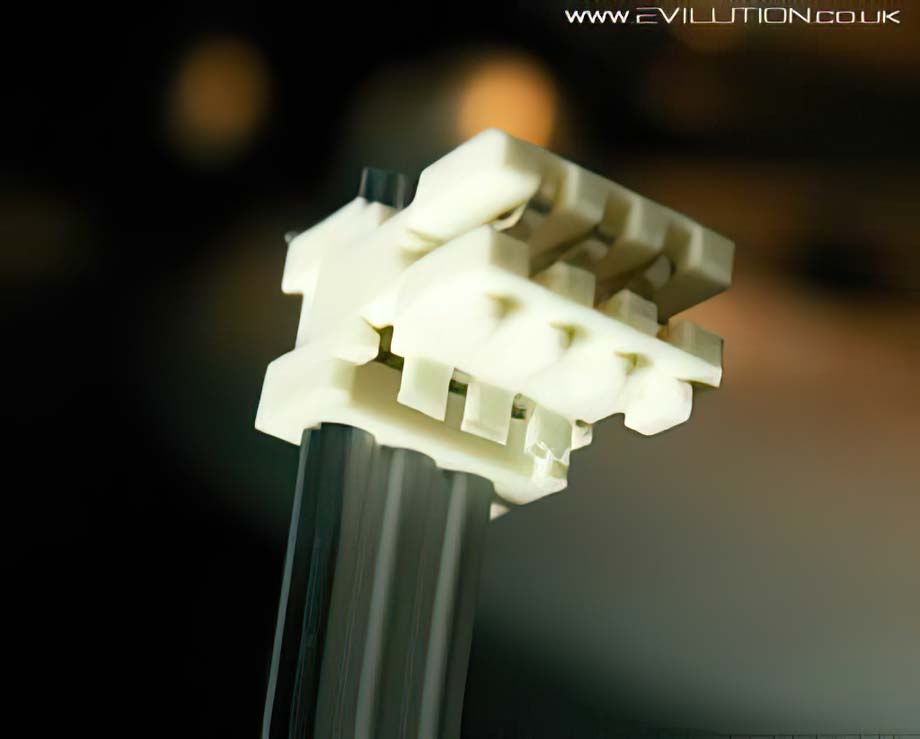
Page 13 section 7.5 shows you the orientation of the lead and the connector.
I decided to add this close up at a different angle to avoid confusion.
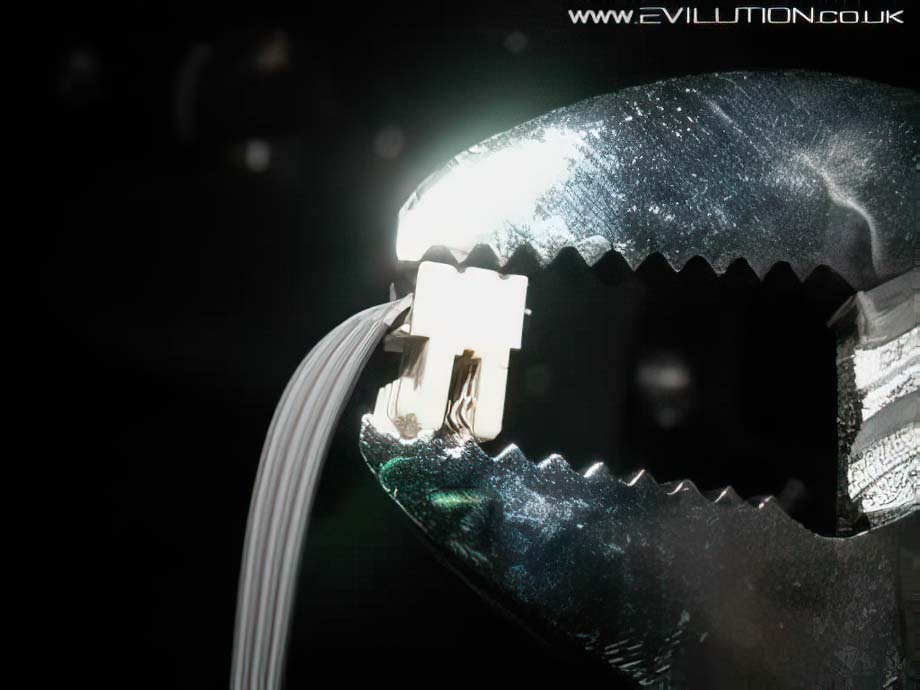
Page 13 section 7.7 shows the connector being set with a vice or clamp, I did mine easily with a pair of water pump pliers. You could use a big pair of pliers too.
Routing The Wires
First off you should remember that all the pictures in the manual relate to a left hand drive smart.
If you are fitting it to an early 450 smart (2002 and before) you will find the wire routing instructions perfect and tidy.
If on the other hand you are fitting it to a later smart 450 (2003 and after) you may want to follow these instructions.
Page 21 section 8.12 ‘Now comes the tricky part. Push the wire through the gap between the dash and speedometer housing…….until it appears on the other side’
Pushing wires is like trying to push rope up hill so I dispensed with that page and took the speedo housing off and probably saved myself a lot of time, plus I can safely route the cables and ensure they don’t get trapped or caught.
To remove the speedo you need either a Torx 10 screwdriver or a long 1.5mm allen key. I recommend using allen keys as they are easier to get. Standard allen keys are too short for 2 of the screws so you will need a long arm 1.5mm..
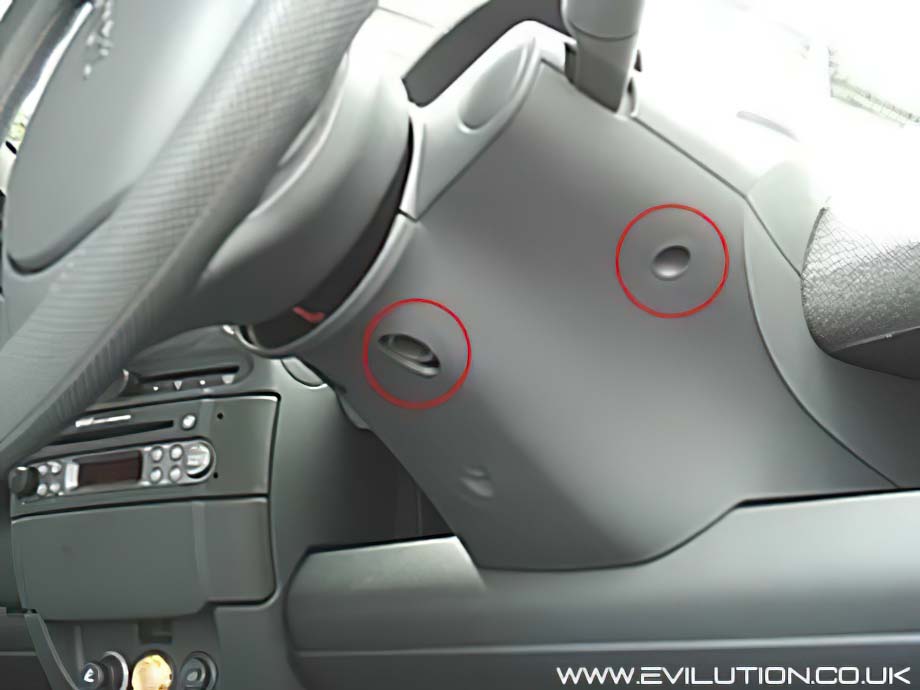
Undo the 4 screws circled in red and pull the speedo housing up, twist it around and rest on the dashboard.
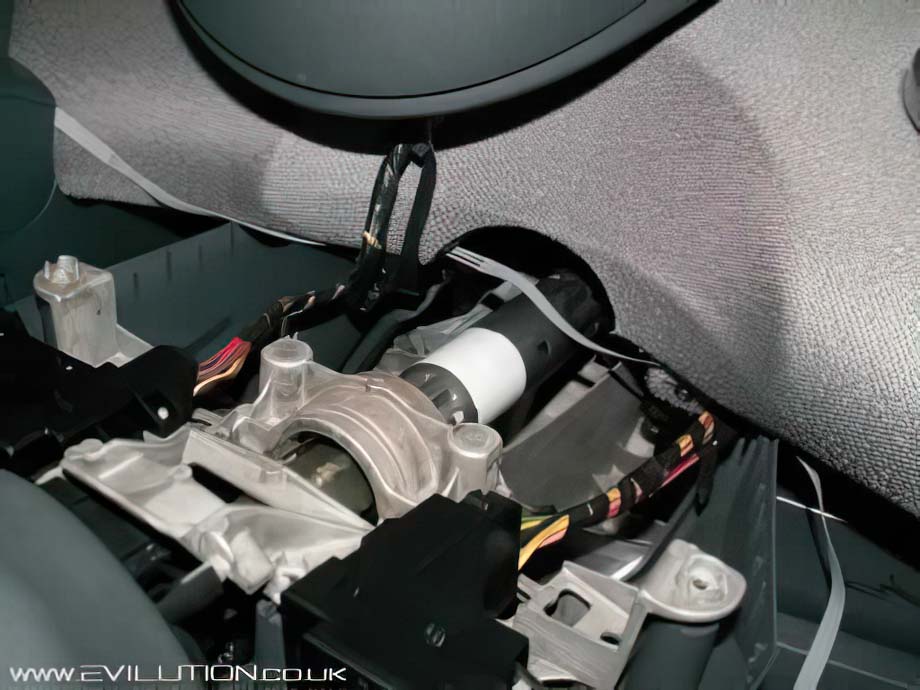
With that bit out the way you can manually route the cable in seconds.
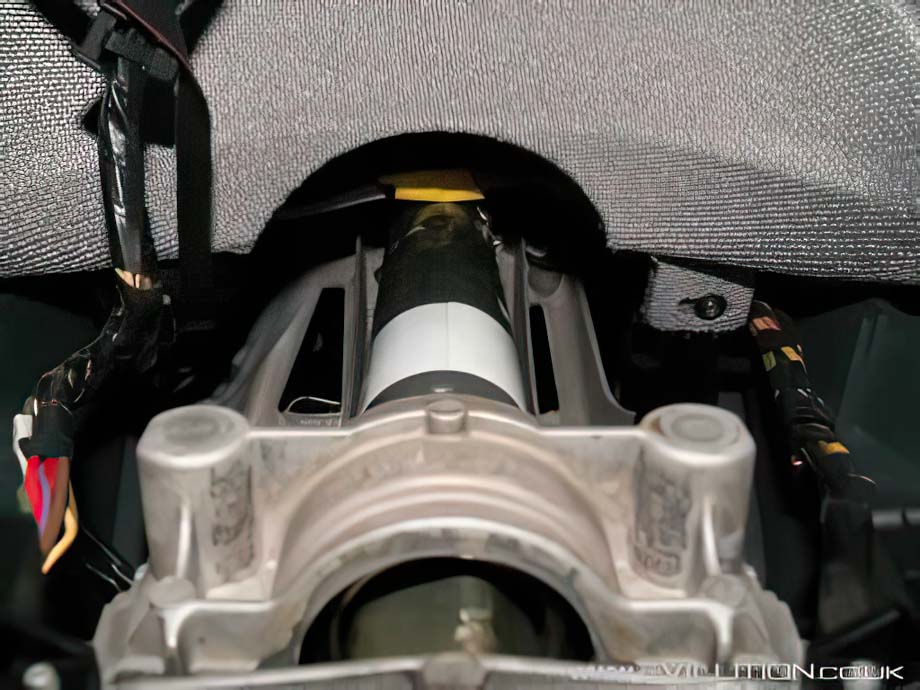
Push all the cables under the dash so they can’t be seen, I opted to wrap a bit of electrical tape around the wire where it touched the steering column. I doubt it would ever damage the wires but it only took a few seconds and better safe than sorry.
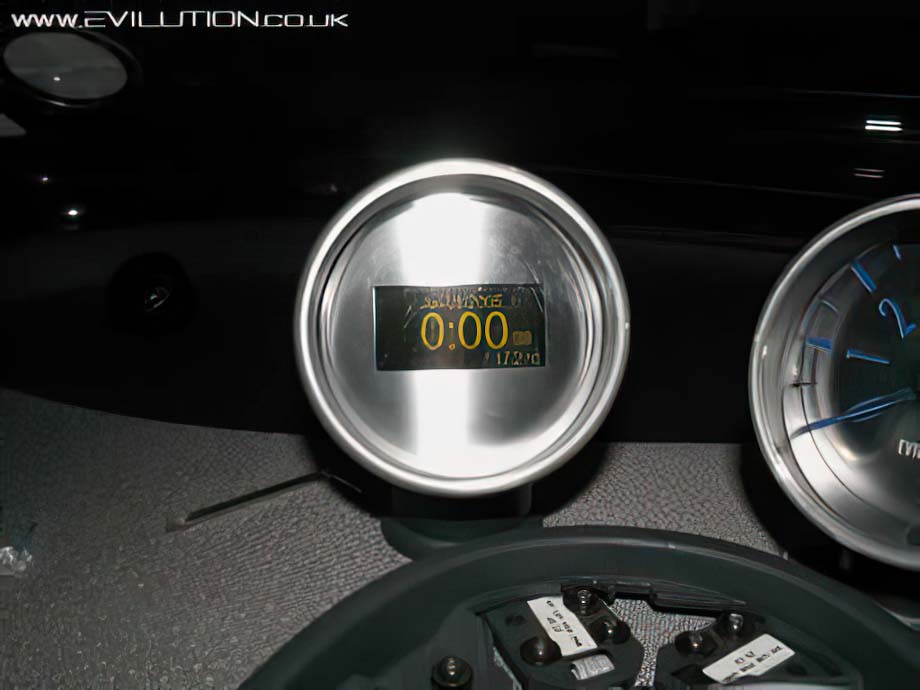
As soon as you connect the power cable you can bring the display to life by clicking one of the buttons on the back.
It won’t show any car info until it is connected to the OBD and the ignition is on.

As the OBD connector doesn’t clip in place it is necessary to add 3 dummy pins to hold the connector in the socket.
The dummy pins go in holes 1, 9 and 16. The pictures above and below show these in place.
The OBD connector supplied has each hole numbered on the outside so getting it wrong is going to be hard. Take your time.
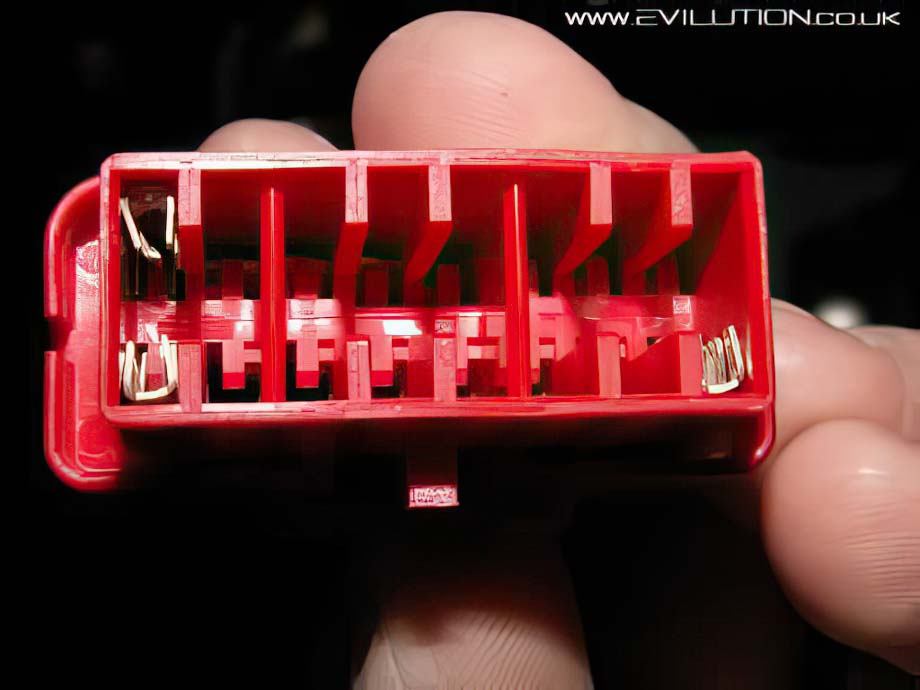
There is no picture displayed for the Gen2 final 2 wires but if you look at Page 19 section 8.8 it shows the correct placement.
It is very important you get these last 2 connection correct. The wire with the black stripe must go to hole number 8 which is the only corner without a pin (look at the numbers on the side). The remaining wire must go in hole number 7 which (strangely) is next to hole 8.
Double check everything, put your speedo back on, fix down everything that is currently off and plug the OBD connector in.
Start your car and stare in amazement at the beauty of the X-Gauge.
How Much And Where?
Unfortunately the final batch of these sold in December 2011. If you want one you will have to beg on the forums.