

Mod Description
If you remove the headlights or change the bulbs, the headlights may be out of alignment. They may be too low or dazzling drivers.Mod Details
PremiumNo Difficulty
 Mod ID345
CreditEvilution
For
Mod ID345
CreditEvilution
For


 Linkhttps://www.evilution.co.uk/mod/headlight-adjustment.htm Copy to Clipboard
If you change your headlight bulbs you may find that your headlight alignment is out slightly. It could be poorly made bulbs, badly seat bulbs or badly fitted bulbs.The easiest way to check is to shine your dipped beam headlights against a wall and judge it with your eyes.
Both headlight beams should be about the same height, pointing slightly downwards. You can check which way your lights are facing by marking the cut off line on the wall and pushing the car backwards a little way. The cut off line should have moved downwards. If they have moved upwards then the headlights are facing up and will blind oncoming drivers.
To pass a yearly road test such as an MOT in the UK, the light adjustment is checked. If they are out of alignment, your car will fail. They will offer to realign the lights but you will probably get ripped off for the work.
LHT Or RHT?
Left hand traffic – the car drives on the left side of the road.
Right hand traffic – the car drives on the right side of the road.


450 Fortwo
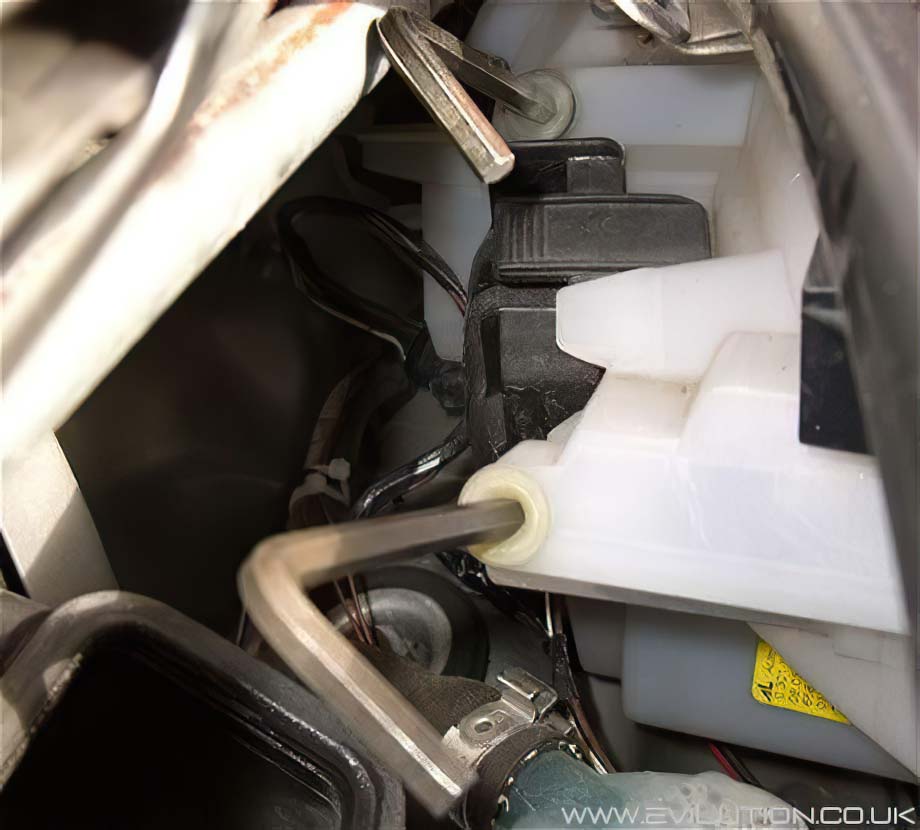
You don’t have to remove the front panel but it helps. This information can be found here. Remove the top cover by undoing the 3 Torx screws. The centre screw is Torx25 and the outer screws are Torx30.
Pull the plastic cover directly upwards to remove it from the car.
This adjuster moves the headlight reflector left and right using a 6mm hexagon key (allen key).
This adjuster moves the headlight reflector up and down using a 6mm hexagon key (allen key).

When replacing the cover, ensure it’s sitting behind the headlight tabs.
Thanks to BlackDog for the picture below.
This shows that it is possible to adjust the headlights through the service screens without removing the front panels. The space is a bit tight so don’t drop the allen key, tie string around it just in case.
It may turn out to be a lot easier if you have a flexidrive screwdriver and a 6mm bit.
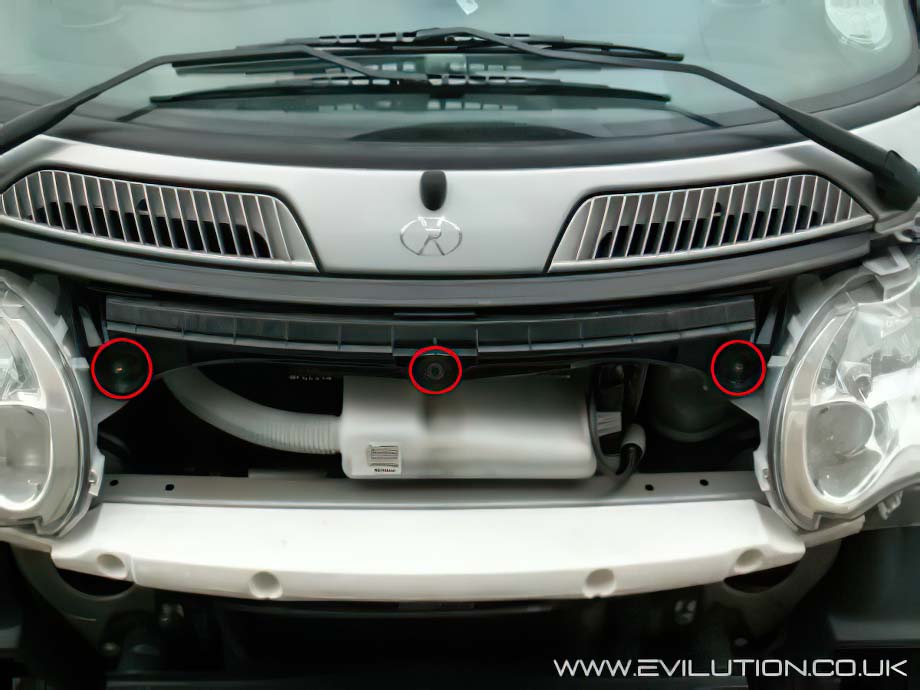
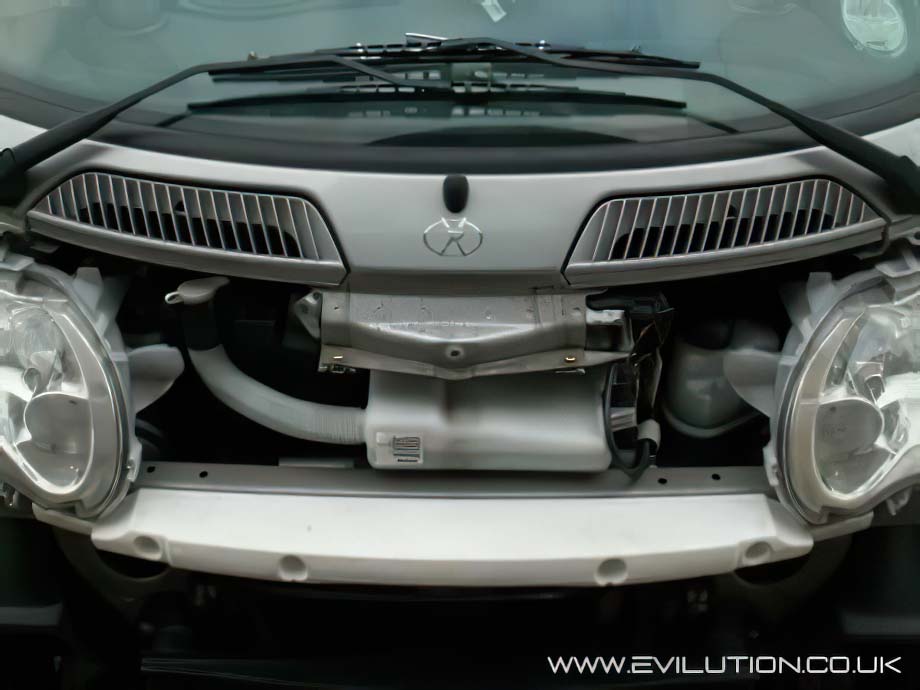
451 Smart Fortwo
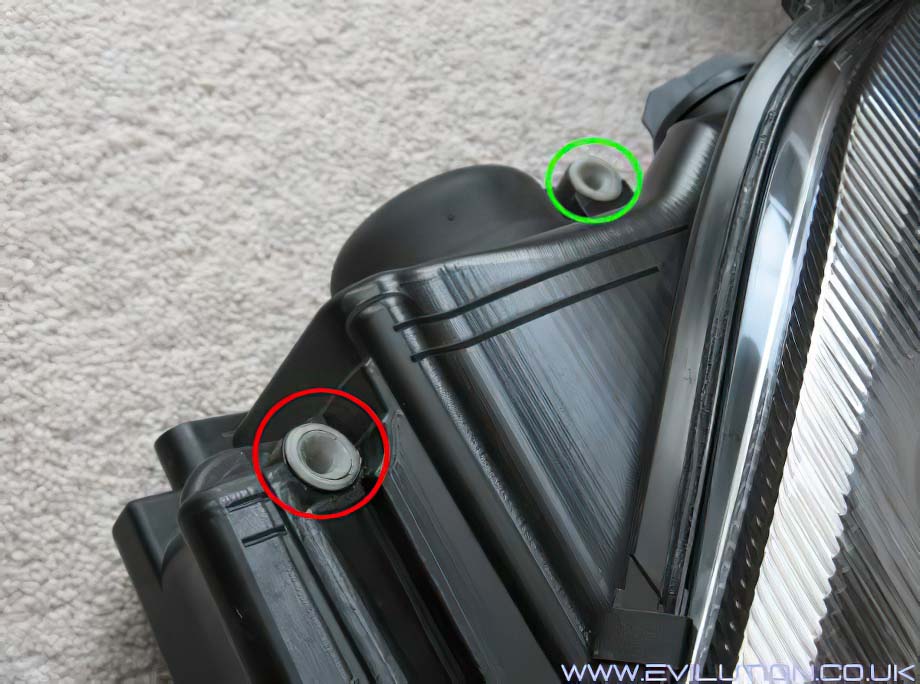
Gain access to the headlights by opening the bonnet. Look on the top of each light and you will see 2 adjustment screws (circled below).
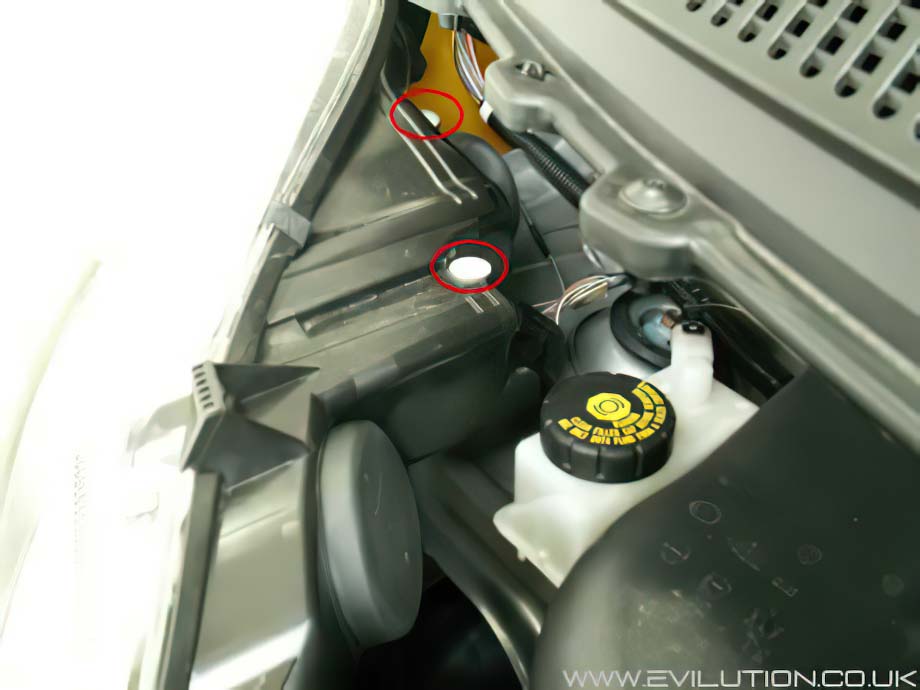
The adjuster near the middle of the car (circled red below) adjusts the both beams up and down. The adjuster near the side of the car (circled green below) adjusts the dipped beam left to right.
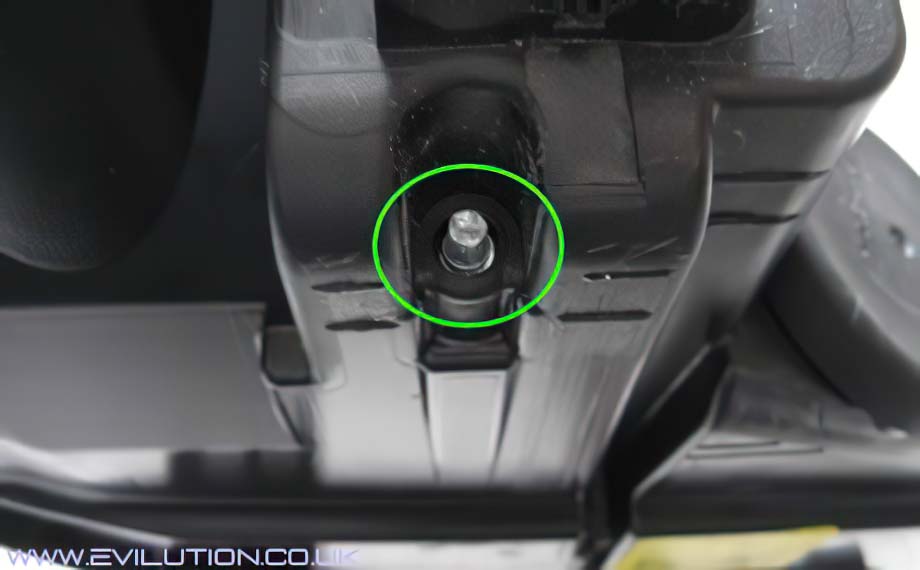
With the headlight removed there’s a pentagon socket, you don’t need to adjust this.
You shouldn’t need to adjust left and right, up and down should do the job perfectly.
452 Roadster
Because of the tight space, it can be easier to remove the light units so you can fine tune the adjustment. Put the light unit in place to check before screwing it back down.
The back of the light units have three 7mm adjustment bolts.
Bolt 1 adjusts the up and down of the beam.
Bolt 2 adjusts the left and right of the beam.
Bolt 3 is not usually needed, it is the pivot point for the other two bolts.
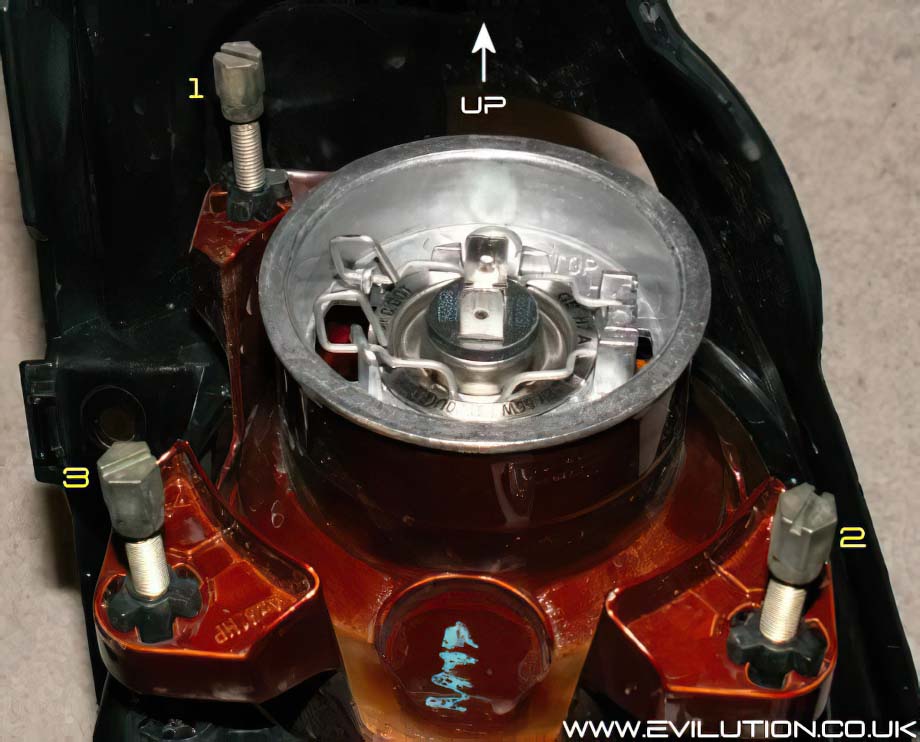
Adjust bolt 2 and 3 so they have the same gap between the light and the holder. This will allow the light to shine directly straight forwards. Now adjust bolt 1 to move the light up or down to the correct level stated below.
Repeat on the other side so both lines are level.
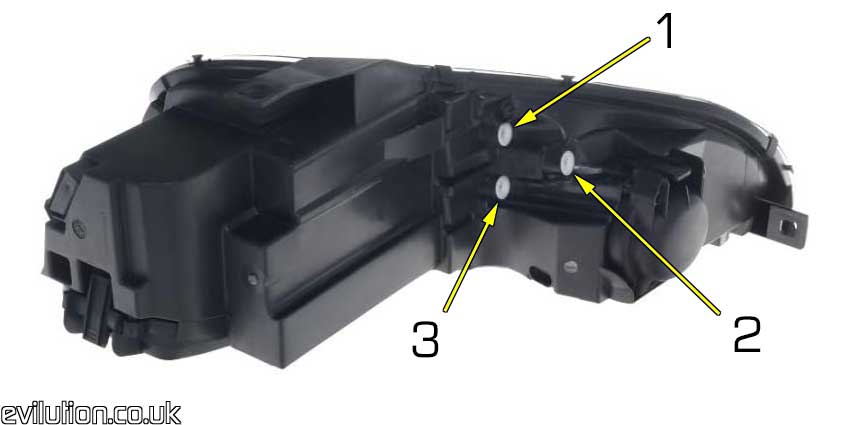
454 Forfour
1 – Low beam vertical adjustment
2 – High beam horizontal adjustment
3 – Low beam horizontal adjustment
How Do I Know If/When My Lights Are Correctly Aligned?
Without the correct equipment it’s impossible to be 100% accurate but a good guess is better than illuminating the moon or on coming traffic.
Pull up close to a wall or fence. Use a marker or a bit of tape to make 2 X’s. These X’s should be directly in front of the dipped beam bulbs.
Pull the back away from the wall so the headlights are 5 meters away from the X’s.
Using the adjusters on the headlights, move the projected light so the cut off line is 5cm below the centre of the X. That is the vertical alignment sorted.
Each light beam will have an up-turn that travels up and off to the left (on RHD cars).
This up-turn needs to start about the same distance from the X on both sides. That is the horizontal alignment sorted.
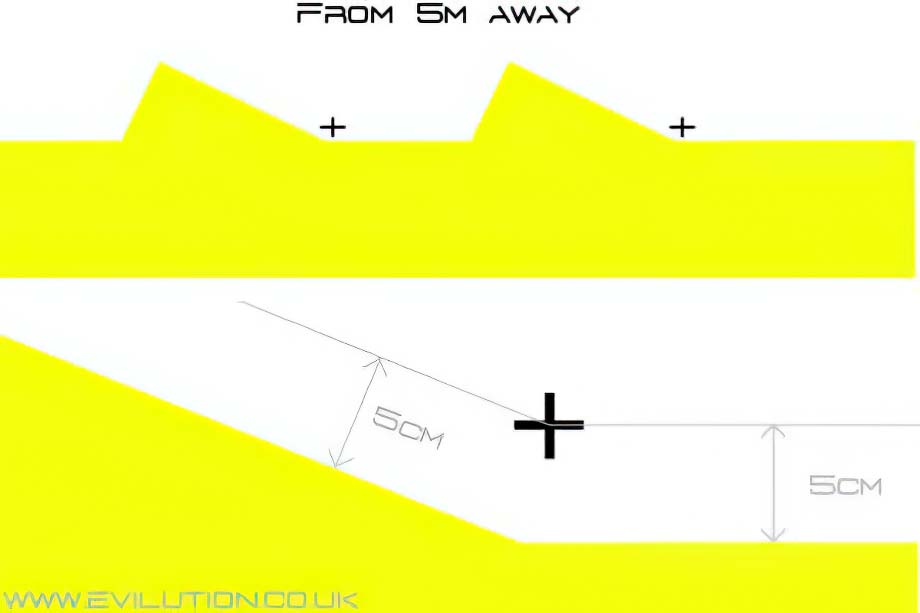
As I said earlier, it isn’t perfect but it’s better than nothing. Ideally you need to go to an MOT station and get them to use their beam setter.
451 Smart Light Output
The new smart (451) uses projector lights like the Roadster, these offer superior light output. One thing that is different is the beam shape. The twin upturns seen on the fortwo and Roadster have now been replaced with a Z-line light cut off shape. This shape is shown below.
The new shape allows extra lighting of the road side but reduces glare to people you are overtaking.
Roadster Problems
If you have your dipped beams turned on and you don’t get a nice pair of cut off lines and all you get is the shape below for one or both lights…

…it means that you have wired your full beams to the dipped beams. Swap the top and bottom pair of connectors and try again.
My Upturns Travel In The Other Direction
That’s because you have left hand drive headlights.
My Head Lights Won’t Adjust Properly
It’s a fairly rare occurrence but it has been known for the reflector to unclip itself from the adjuster so it’s either wildly out of adjustment, won’t pull in far enough or alignment changes itself.
The only way to remedy this is to remove the headlight and take it apart.
Once apart you should be able to see which clip isn’t attached. A quick push on the reflector will reseat the clip and the correct adjustment can be made.
I Can’t See A Distinct Cut Off Line
There is a technical name for this, it’s called ‘crap bulbs’. Poorly made bulbs do not create a crisp clear lighting pattern because of excessive glare. Auto Express magazine did a test on bulbs and the results were shocking.
Amongst the poor performers were:
Osram Silverstar
Bosch Premium
Bosch Xenon Power
Ring Autobulb
Ring Ultra Xenon
GE Megalight Plus
PIAA Platinum White
Ring Ice Blue
Halfords Laser Blue
So it goes to show that costly bulbs from known brands don’t necessasarily mean quality.
The best bulbs tested were as follows:
Hella Standard
Osram Standard
Osram Super
Halfords Brilliance
Halfords Super Brilliance
Philips Power2Night GT150
Osram Cool Blue
Philips Blue Vision
So What Are The Best Bulbs To Get?
Well, none of the above really. PIAA bulbs can be good (except for the platinum white) but expensive, HIDs give good output but are expensive or poor quality and illegal.
At the moment, the best bulbs to get are Osram Nightbreakers and Philips X-treme Power.
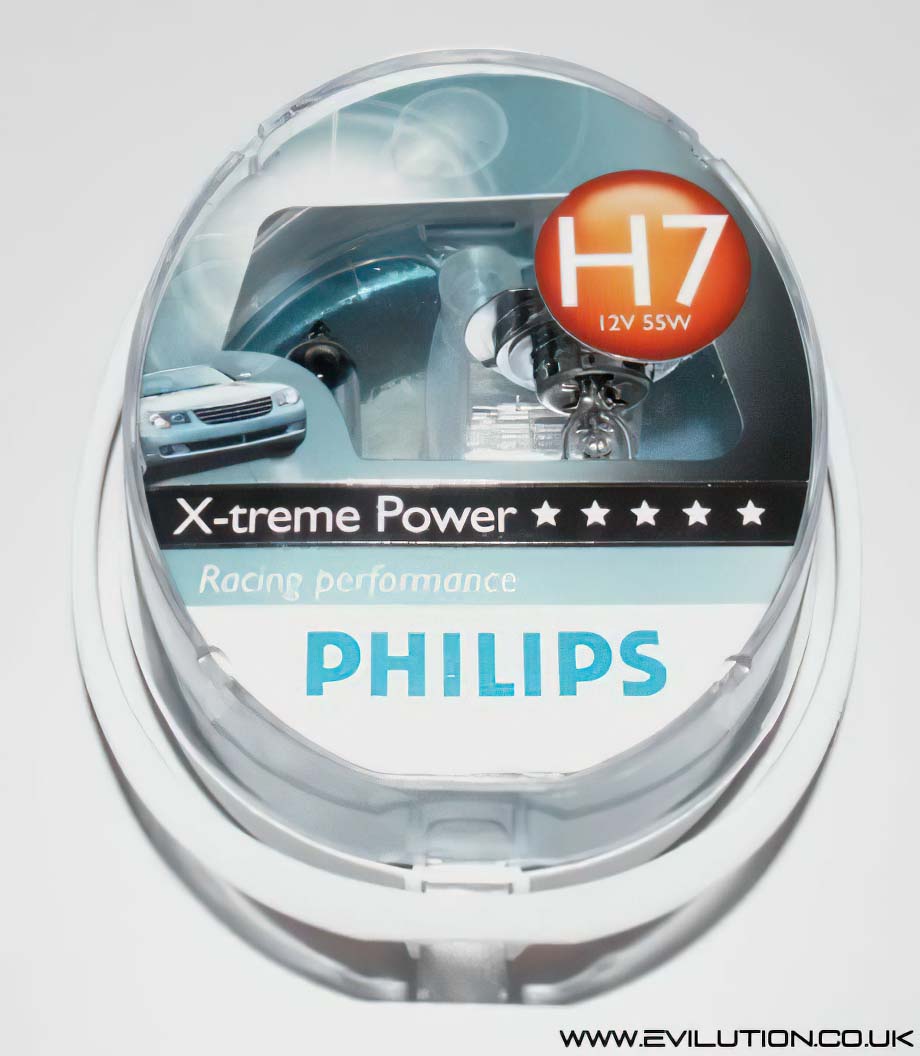
Philips X-treme retail at £25 a pair. Osram Nightbreakers are cheaper at about £15.
Bulb Construction
For a beam of light to be placed at a particular point it has to hit the reflector at the correct angle. The filament inside the bulb has to be positioned within a fraction of a millimetre to create the perfect beam pattern. If the bulb is badly manufactured or the bulb isn’t installed very well, it can throw the beam off. It is the poor placement of the filament that causes glare and the poor cut off line.
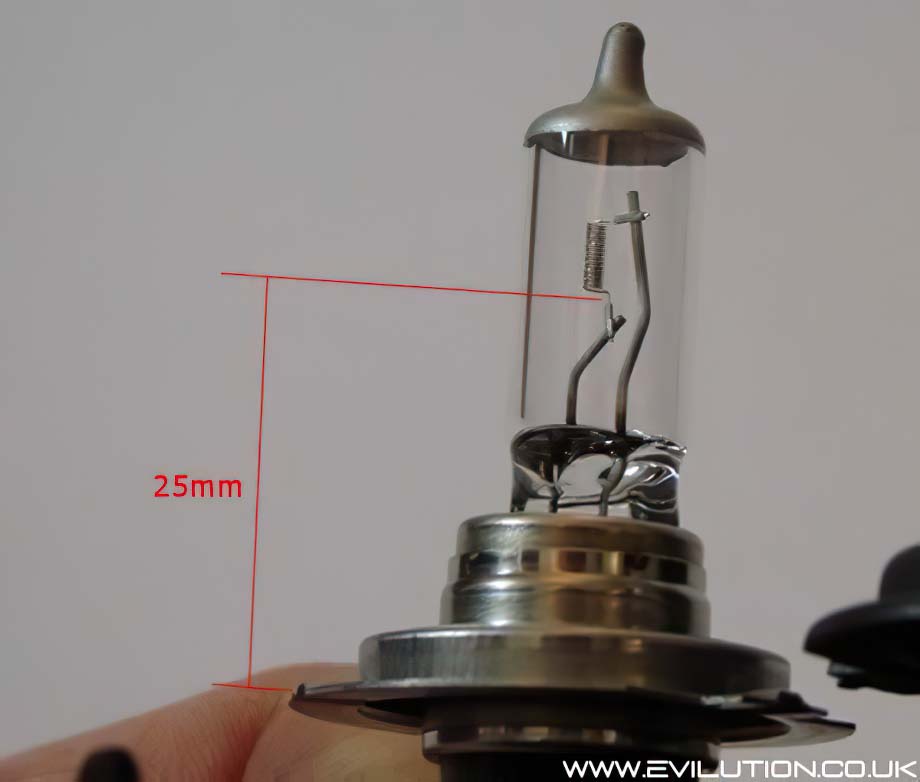
One of the main dimensions for an H7 bulb is the distance from the top of the base to the bottom of the filament. This distance should be 25mm (+ or – 0.2mm). If you have a poor cut off line, check the bulb by measuring this dimension (don’t touch the glass).
How Do I Know If I Have Good Bulbs?
As said before, you should get a fairly crisp cut off line but there is one more thing to look for. Check out the quality of the up-turns in the dark and up against a smooth surface. A sign of a good bulb is that the up-turns aren’t solid light but actually have lines running through them perpendicular to the up-turns top line. This is actually the magnification of the bulbs filament.
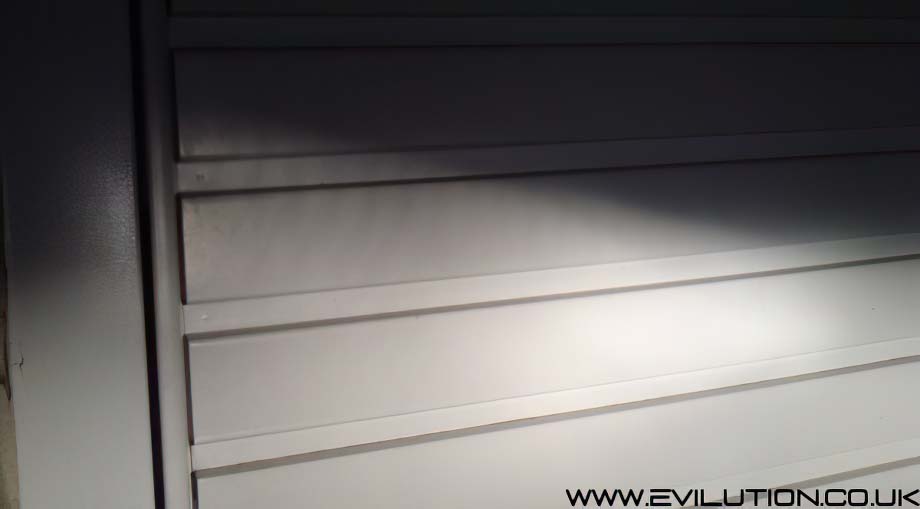
Look closely at the upturn and you can actually see the coil of the bulb.