Narrow your search
Modification Details
Translate Evilution
german french spanish italian greek finish danish polish japanese russian
Search Evilution
Most Viewed Pages
Most Rated Pages
2012 Facelift Retrofit
Do you own an old 451 but prefer the 2012 facelift bodykit? Time for a change.
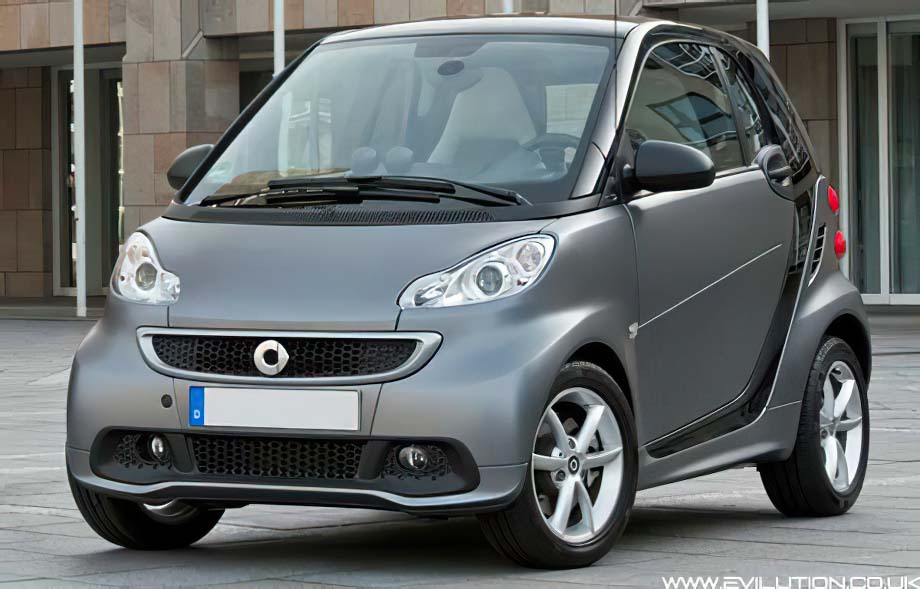
The 2012 smart fortwo 451 has a redesigned body kit that looks nicer than the old unpainted versions found on the earlier cars. You don't need to get a new car, get a new body kit.


Front Splitter


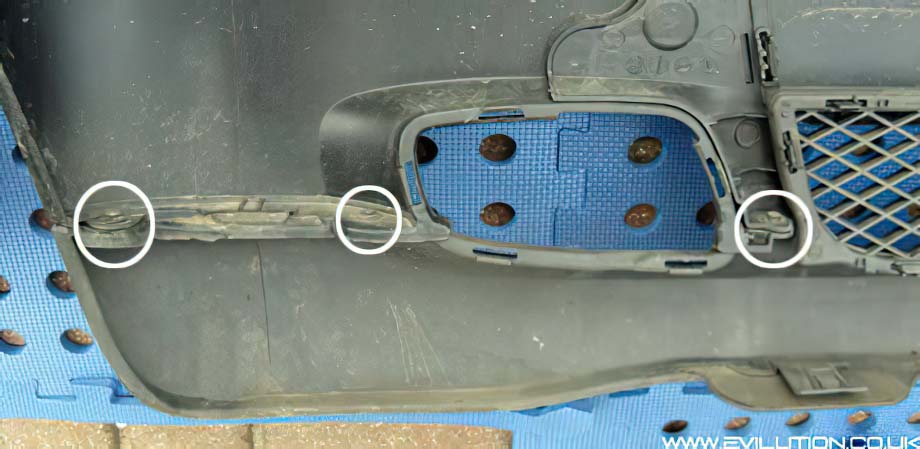
Remove the front panels as seen here.

There are several plastic rivets on each side of the lower front splitter


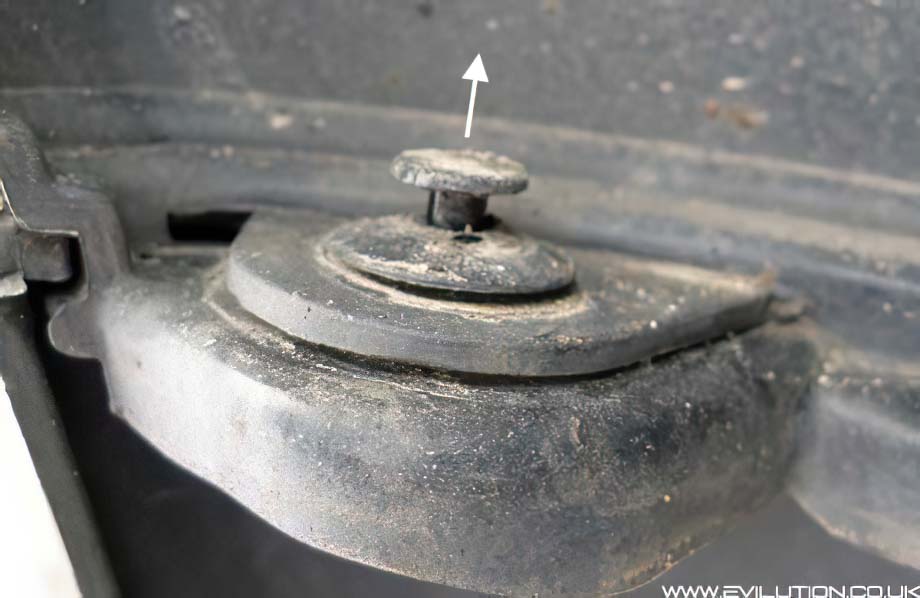
Pull the centre pin out and then pull the insert out.


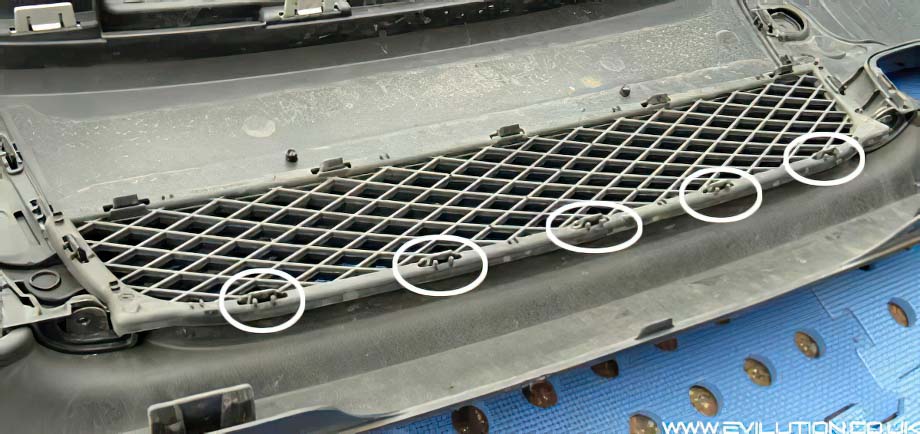
Unclip the grill from the inside. You can disconnect just the lower clips to remove
the splitter but the whole grill has to come off to fit the replacement facelift splitter.


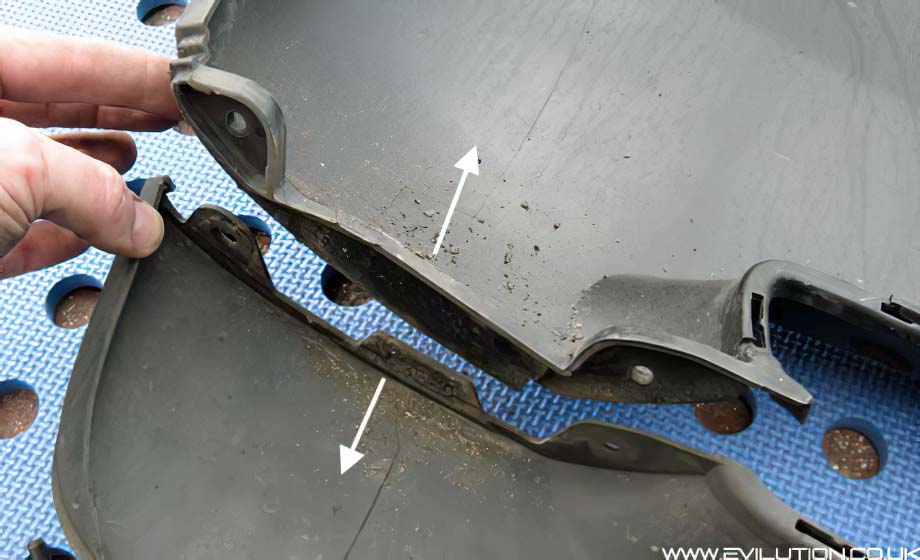
Push the splitter forward to free it from the front panels.


Here is the facelift splitter and mounting frame, below it is the old splitter.


It clips into the front panel all the way along including the original inserts and plastic pins.


Here is the facelift splitter fitted to old front panels.


The final piece is the honeycomb grill. There are 3 versions.
The plain version (shown below), one with fog light holes and 1 with DRL's.


The mesh just clips in all the way around. There are several clips along the bottom edge but not that
many across the top. Make sure you clip the top furthest edges in place, they can be a bit tricky.


Refit the front panels to the car and admire the new facelifted look.


There is a piece that goes behind it all to add rigidity but I didn't fit it and it seems ok.

Part Numbers For The Front Section

Take these numbers to smart:
A451 885 02 25 (Front spoiler)
A451 888 04 23
(Honeycomb mesh grill)

You will have to tell them what colour you want the main panel. CA7L is black.

I was the first person in the UK to buy these facelift panels and at the time of purchase 
in June 2012 the total for the front 2 sections was £77.80 but prices change regularly.

Rear Valance

The rear valance comes in 3 parts. The main panel, insert and lower mesh.
Part numbers to be confirmed when I find my paperwork.


The insert simply clips into the front of the mesh panel all the way along.


It will sit nice and flush when correctly fitted.


The mesh and insert combination pushes into the back of the main panel.


Again, it clips in all the way around to secure the 3 parts together.


Here is the complete panel.


Fitting the valance is easy, Remove the Torx25 screws from each side, circled below.


Look into the wheel arch and pull the plastic pin out of the insert.
Repeat on the other side and remove both inserts as well.


Here you can see the insert and the expansion pin.


Look underneath the valance and you will see a plastic clip each side, pull down to release.


Push the valance end towards the front of the car to release a clip, pull down and back.


Repeat on the other side so both sides are unclipped like this.


Grab the bottom edge of the valance and lift it up and all the clips will disengage.


Fit the new valance in the reverse of removal, ensure all the clips are pushed in and
the inserts and plastic pins are back in place. Look underneath once again you will
notice that the tabs are at an odd angle. They are designed to be bent backwards.


With the tab bent backwards they slot and clip into the plastic carrier.


Stand back and admire the 2012 facelift look.


Part Numbers For The Rear Section

Take these numbers to smart:
A451 647 06 84 (main panel)
A451 885 00 53 (honeycomb grill section)
A451 885 00 74 (insert)

You will have to tell them what colour you want the main panel. CA7L is black.

I was the first person in the UK to buy these facelift panels and at the time of purchase
in June 2012 the total for the rear 3 sections was £95.68 but prices change regularly.

Grill

The new grill has the badge in it and a different design of frame.


It will fit but I think it's horrible so won't be fitting one but it will clip straight in place.
You will also need the tabs that you swing out to unlatch the front panel and probably the
spindles that these tabs attach to. Tariq A did the retrofit and supplied the part numbers & info.


To fit the new grill you will have to remove the front panels from the car.
Then you can unclip the old grill and replace it with the new design grill.

Part Numbers For The Grill Section

A451 880 0220 / C22A - Release Handle (plastic parts that integrate with the grille fascia).
A451 880 0120 / C22A - Release Handle.
A451 750 0484 / C22A – Lock (these are the replacement locking spindles that are attached to the ‘release handle’ and which hold down the service flap).
A451 750 0384 / C22A - Lock.
A451 817 0516 - Company Sign (the self-adhesive ‘polo mint’ badge for the grille).
A451 888 0051 / C50L - Radiator Grille (Silver) (this is the surround that goes around
the grille, it’s also available in anthracite for spraying up).
A451 888 0223 / C22A - Ornamental Grille (black) (the hexagon pattern plastic grille).


Side Skirts

These are slightly different as they protrude slightly further out than the Tridion giving
it a bit more protection. These fit directly to the car in the same way as the old skirts.

A451 690 0526 - Left side skirt
A451 690 0626 - Right side skirt

How to remove and replace the side skirts - click.


Click if Info Helpful

Buy me a drink

Contact us about mod

Print page

Translate

Back to top