450 Brake Light Switch
This is a common fault that is easily noticed and rectified.
How Do I Know If The Brake Light Switch Needs Replacing?
If you have problems selecting reverse or getting from reverse to neutral or indeed if you notice none of the brake lights are working, chances are you will need to replace the switch.
Why Has It Happened? The failure of the switch is almost certainly down to 1 of 3 possibilities.
Switch contacts failed. Switch short circuited due to water ingress. Switch submerged in water. 
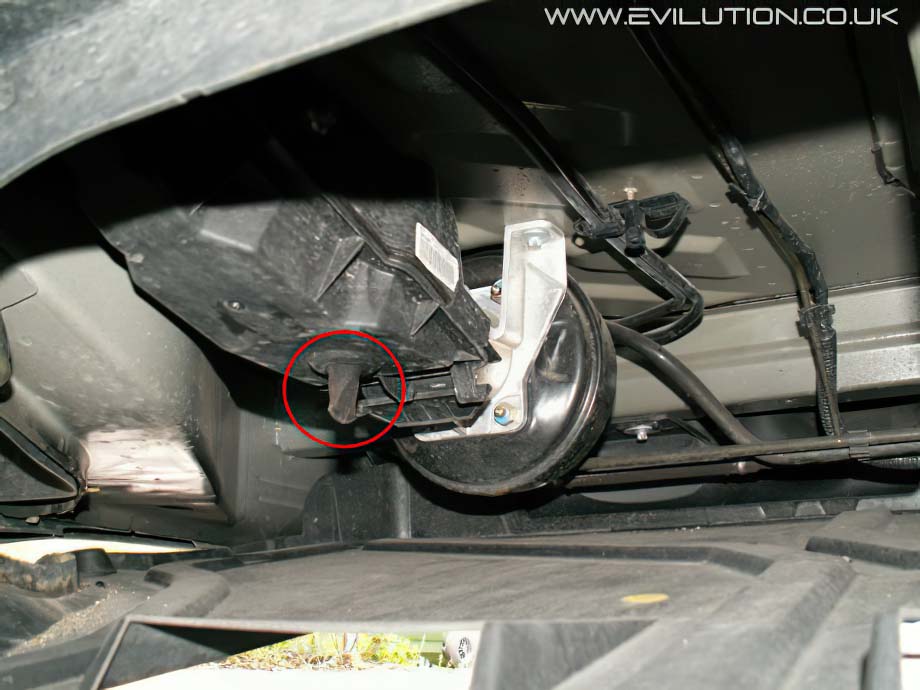
The switch box cover has a drain port which can get blocked, massage this port to see if any water comes out. If a lot of water comes out, the drain was blocked and the switch could have been submerged. We all know that water and electrics don't mix. If a small amount of water came out, you have a leak into the box which isn't that bad.
The wiring can be rectified so any water won't affect the new switch. If no water came out, the switch probably just died of natural causes.
What Parts Do I Need? SA451 545 02 09/2 (Brake light switch and cover).
Thanks to Mike for confirming that the 451 switch and cover fit the 450. Gaining Access To The Box Lower the front undertray, you don't have to remove the front panels which saves time. Not removing the panels makes this job 20 minutes shorter and not that much harder. The Parts You Will Be Replacing Primarily you will be replacing the switch but you should also change the box cover as it comes with a fresh seal. The seal is a non setting rubber polymer. The switch will probably be a different colour to the one shown as they seem to change it on every revision. Replacing The Switch At the back of the box is a large plastic catch, pull it down to unhook it from the top.
Start pulling the cover down from the back and sides, eventually it will hinge down. Top tip: if you are attempting this when it is cold outside, you may struggle to remove the cover.
You may also find that pulling too hard will snap the catch. In this situation you are going to have to heat the outside edge of the box with a hair dryer or a heat gun on the low setting. It also helps to heat up the new seal the same way when refitting the new cover.
This is what you are presented with once the cover is off. The actuator
arm extends to press the brake switch when the brake pedal is pushed.
Removal of the switch is very easy, a quarter turn anti-clockwise and it comes out.
To unplug the connection you have to push in a small tab to release the plug.
Plug the new switch into the connection and refit to the holder with a quarter turn clockwise.
It is important to notice the updated way that the wires should run.
Ensure that they loop down before going up to the switch, make sure the loop
does not touch the switch at all. This is so water running down the wire drips off
into the box and doesn't run into the switch causing it to fail again.
Get the new box cover and latch the 2 pegs into the front and swing the cover upwards.
Press the box cover firmly in position while reattaching the large clip at the back.
This shows the large clip right at the back of the box. This holds a constant tension to the rubber polymer seal. Squeeze all around the box edge to help the seal adhere to both surfaces. Over time, the pressure of the large rear clip will create a decent seal all round.
Again, massage the drain port as they have a tendancy to become stuck together when new due to the release agent used when forming the drain.
Job done, test your brake lights work ok and that you can select R and N.