Narrow your search
Modification Details
Translate Evilution
german french spanish italian greek finish danish polish japanese russian
Search Evilution
Most Viewed Pages
Most Rated Pages
Retrofitting the roadster hardtop
Hard top installation kit and install guide
OK, if you fancy having the hartop installed on the roadster then you are going to
need some parts, it's not as easy as getting some roof panels and then fitting them
straight in, you will need the following from smart.

Parts Required

These parts are now all discontinued and unavailable from smart.

The roof panel sections are the expensive parts, they come in 3 varieties, textured black matt, smooth black gloss and silver. They are very expensive, £900 + vat from directly from smart, they come up on ebay occassionaly and fetch circa £500.

The only style you can buy new from smart are the textured finish.
Right Q0009340V009C78A00 and left Q0009338V009C78A00

The hardtop case, Q0015447V001C02Q0 and the polystyrene inserts
Q0013165V006000000 are handy if you want to store the hard top off of the car.

If you plan to buy the roof, bag and polystyrene inserts in 1 go, smart have 1 number.
Q0018870V003000000

Ok we definitely need the helpfully named 'bracket' from smart SA452 778 0014
which will give you the following parts.


The following roof trim pieces are optional depending if you are feeling rich (circa 20 quid each).
They come with the holes already in place although your standard front roof trim does have the marks to show where to cut. A Dremmel will make light work of your original trims.

OTVs rear panel did not have the cutout points, while the front did.

Q0014468V001CB0A00 Front roof trim
Q0014470V002CB0A00 Rool Bar center


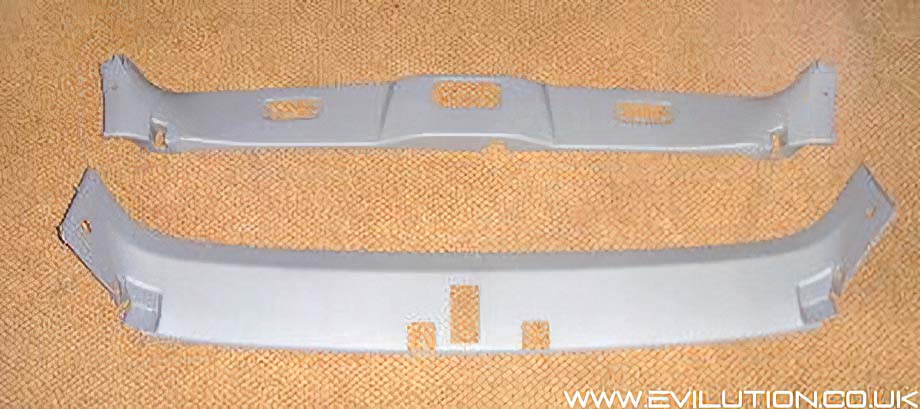
As you can see there are little cutouts for the roof attachments in these panels,
the originals have little markings on the rear to show where to cut.

If you are buying the fitting kit and the roof trims, again, there is 1 number for the whole kit.
Q0018871V002000000

Front installation

The front is the easier of the 2 parts to install, first retract the roof.

Using tape to protect the trims remove the plasting clip bolts from
the A Pillars and the roof trim with a knife or tack remover
 (6 in total).


Using a T20, unscrew and pull out the sun visors.

Again using tape and knife un-pop the courtesy light


Unhook both ends of the trim and you are left with it hanging, attached by to self clipping bolts behind the light section.


Holding the light section of the trim, pull firmly downwards releasing the spring clips.


If you are installing into a new piece of trim, remove these clips and clip into the new trim,
if you are using your existing pieces again, go and cut the holes with your dremel.

Take the front mount from the bracket set that you bought, fit it using the 2 screws, make
a mental note of which side your roof will fix and screw loosely into the appropriate holes.


Position so that the rubber seal isnt being caught and tighten up.


Now its putting the new trim back on (excuse the colour change, i sprayed mine black prior to fitting), pop on your sun visors, feed your light through the hole, and push the self clipping bolts back onto the frame of the car.


Rehook the ends, screw in the sun visors, reinsert the light, push the self bolts back into A pillars and trim. The front is now completed.


Rear installation
 
Lower the roof down and remove the sidebars.
 
Pop off the 3 small push clips using the tape and blade technique shown previously,
as well as the 4 plastic covers (one side shown).


Pop off the side roof bracket pieces.


Under the 2 plactic covers are 2 of the 3 T30 Bolts, remove all 3 as it
will give you some play with the roof section which we will need later.

 If you have a Roadster Coupe you will have to also remove the rear brace bar, between both rails
is a bolt with a platic hat on, pop off the hat and remove the size 15 bolts, then remove the bar.


Unbolt the seatbelts: there are plastic covers that pop off then using a 17mm socket, remove them.


Remove the plastic side trim by undoing the T15 screw found at the back as well as the plastic clips, you dont have to remove this piece entirely, just make it loose enough.


Your rear roof trim piece should now be quite loose, but its still attached. Using a screwdriver with some protection on it, start carefully feeling your way along the trim, there are 4x clips along this piece at regular intervals, once you find one un pop it, repeat for all.


After all 4 front clips are removed, you should be able to remove one side of the trim,
once one side is out the other follows.


If you are modifying your existing panels, go dremel now.

Remove the petrol cap cover, T15 bolts, except the bottom one which is a fake,
remove petrol cap as well do not drop anything in.


Take your rear bracket from the hardtop kit, align it with the holes
in the underside of the roof and fasten lightly with one screw.


Insert the drainage section to the bracket and loosely fit in place, do not tighten it yet.


At either end of the section are 2 holes, feed the hoses through carefully.


On the petrol intake side, carefully peel back the membrane protection and feel for the cable.
Once you have it, pull the tube through.


Reinsert the pipe and continue downwards until it's all gone, refit the membrane.

On the non fuel filler side, insert the tube into the hole, push,
twist and prod until its down as far as it can go.

Now is a good time to test it, theres no need to pour pints in, just enough
so that you can see it spill over the floor underneath the car on either side.


Happy that both side produce a puddle then great, screw in the bracket tight and
attach the pipe with the provided piece of tape, reinstall the petrol cap and cover.


Fit the new panel or your old Dremmeled panel, it should just pop into
place and be nice and loose and goes round the bolts at either end.


Once the panel is in place, refit the softtop bolts, runner covers and runners and test that it works still, if not then readjust the bolts. Screw in the side panel, and reattach the seatbelts

We now have to clip the front of the panel back in, those annoying clips from earlier, this is a far easier job getting them back in, working from the outer ones inwards, line them up and then push firmly upwards . As the trim is quite flexable, they should clip back in with no problem.

Reattach the rear brace bar (coupe), pop back in all self clipping bolts and covers, job done.


Roof Panel Specs

When the first hard top Roadster left the factory, they were all fitted with gloss black roof panels, although they looked good they scratched very easily, especially when stored in the polystyrene blocks in the rear of the car. To counteract this, they started creating the roof panels in the same textured material as that found on the Fortwo Pure hard top roof. It was much more resistant to scratching but the downside was the matt finish wasn't as nice as the original gloss.

During this time, smart also started making very small quantities of silver gloss roof panels.
The retail cost of these is phenomenal and it's cheaper to have black gloss panels sprayed.

Poor Drainage

The hard top is designed to drain water solely from the back of the roof. The drain must do its job and ensure that no water is left standing otherwise pooled water can ingress into the car.

Parking on a slope can obviously affect the efficiency of the drainage channel.

It is prudent to check the rear drainage collector every once in a while to
ensure it isn't blocked with any debris such as leaves or dirt.

If the water is slow to drain then the pipes could be blocked or not fully pulled through.
It is important that there are no loops in the pipe and that it travels down as directly as possible.

Hardtop Leaks

If you experience leaks when the hardtop is fitted the first thing
to do is to ensure it is fitted correctly along with the side bars.

Check the drainage as explained above.

Visually check the seals on the car and the hardtop panels for any debris or deformation.

Clean the seals with a rubber seal treatment or silicone based lubricant.
This feeds the rubber making it more flexible and stops it perishing.


Click if Info Helpful

Buy me a drink

Contact us about mod

Print page

Translate

Back to top