

Mod Description
Having a DVR recording your driving is a good idea and gives you evidence in case of an accident. However, unless you fit it properly, it might not be as helpful as you think.Mod Details
PremiumNo Difficulty Mod ID947
Creditevilution
For
Mod ID947
Creditevilution
For


 Linkhttps://www.evilution.co.uk/mod/dvr-fitting-and-setup.htm Copy to Clipboard
First you need to choose your DVR camera, then it’s time to position, fit, set up and angle to get the most from it.
Fitting
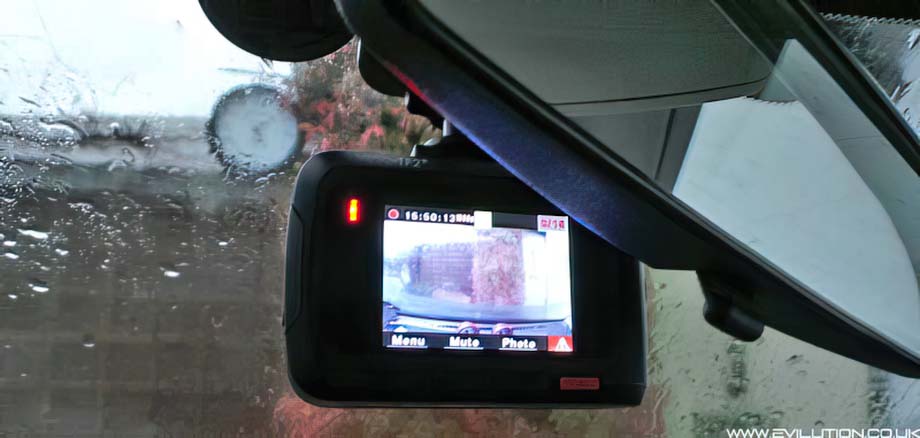
In this example I will be fitting a Vico TF2+ but all other cameras will be the same. It makes sense to hide as much of the DVR behind the rear view mirror. Remove the rear view mirror to give you room to play. Clean the screen and apply the mount.
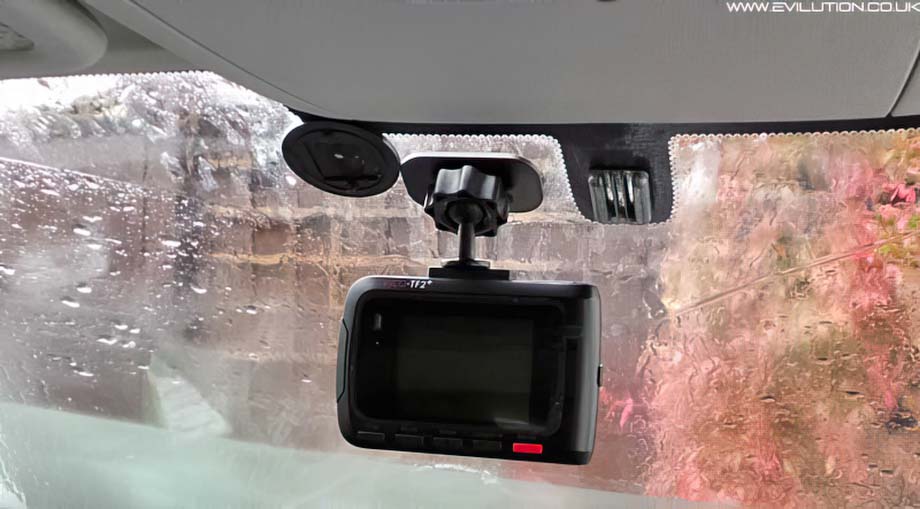
The power wires are normally mini USB connections on 1 end and a cigarette lighter plug on the other. The thin wire can easily be hidden behind the interior roof trim which is easy to remove. Once the wire is routed to the underside of the dashboard you can plug it into the socket and hide the wires.
If you don’t want to plug into the cigarette lighter socket, you can connect to the SAM unit (fuse box). HOWEVER… You can’t just cut off the the plug and wire it in. If you do, you’ll put 12 volts into your 5 volt camera. You will need a 12v to USB convertor. Ideally get one with the correct USB connection to your camera.
Connect the live to an auxiliary fuse holder, add a fuse and plug it in to one of the switched connections. Obviously don’t select a permanent live unless you want your battery to be dead the next day.
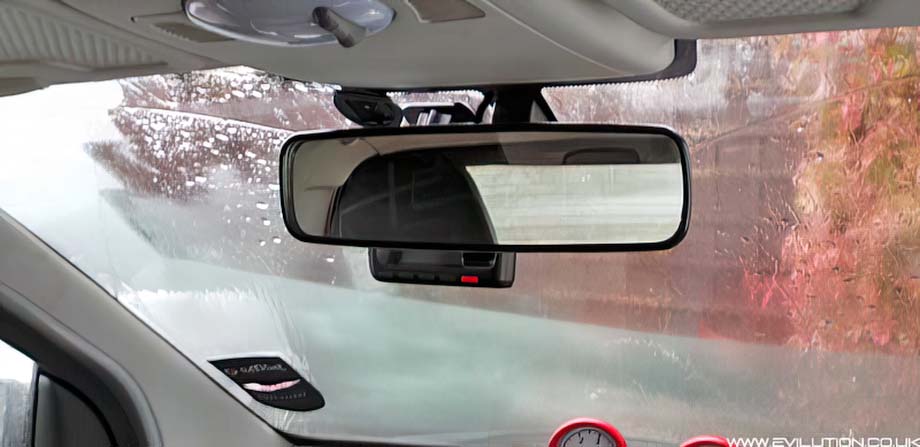
The earth cable of the 12v to USB convertor will need to be connected to the car body. There are several earthing studs around the car. Have a look in each footwell for a suitable ground point. With the rear view mirror refitted you can just see the screen on the DVR. You don’t need to see the whole screen, just enough to know it is turned on.
Insert a memory card (class 6 or higher is recommended) and format the card using the DVR. This ensures that the card is in the correct format to be used by your particular DVR. The larger the capacity of the card, the more it will record before going over old recordings.
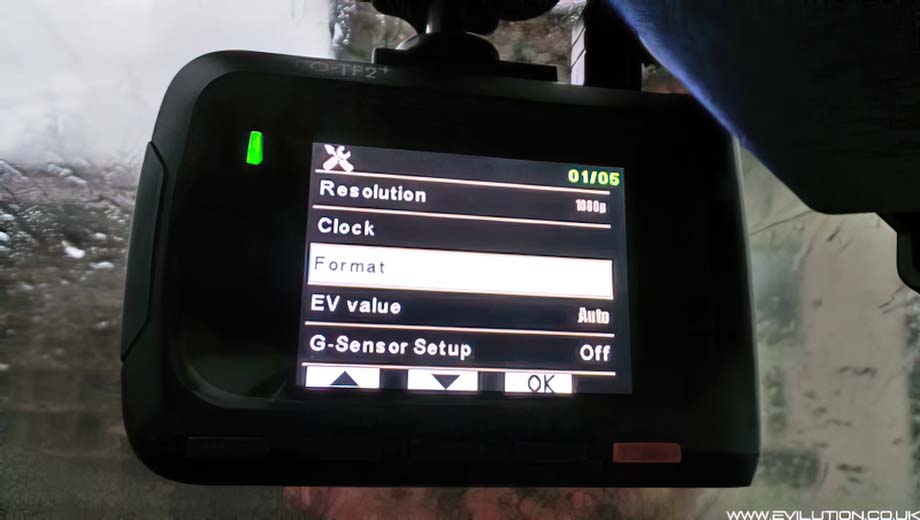
Apply and adjust what ever other settings you require and you are ready to aim it.
Aiming The DVR
People’s immediate reaction is to have the horizon vanishing point dead centre of the frame like this.
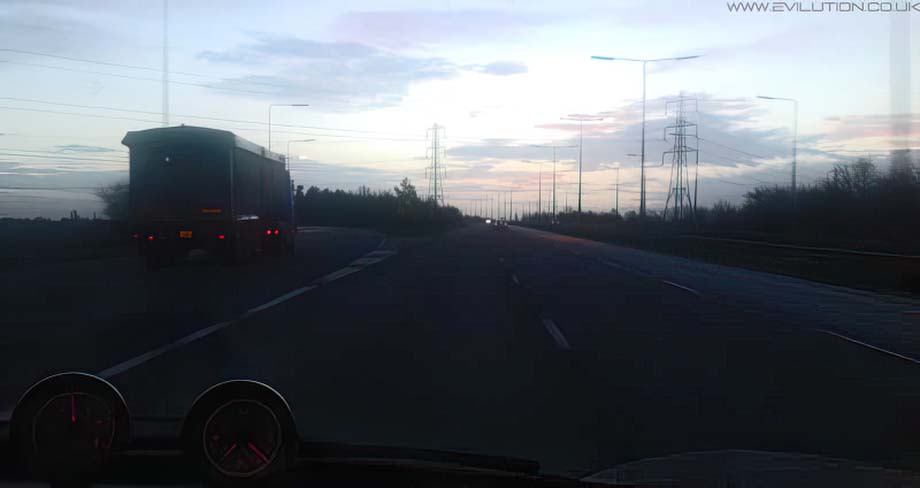
And that’s wrong. I know you feel that having as little of the dashboard in the recording as possible would be a good idea but it’s not. The main problem is automatic contrast. If the sky is brighter than the road then the camera will automatically darken the picture as a reaction to the brightness of the sky. The reduction of contrast is also applied to the road which makes it far too dark as can be seen in the photo above.
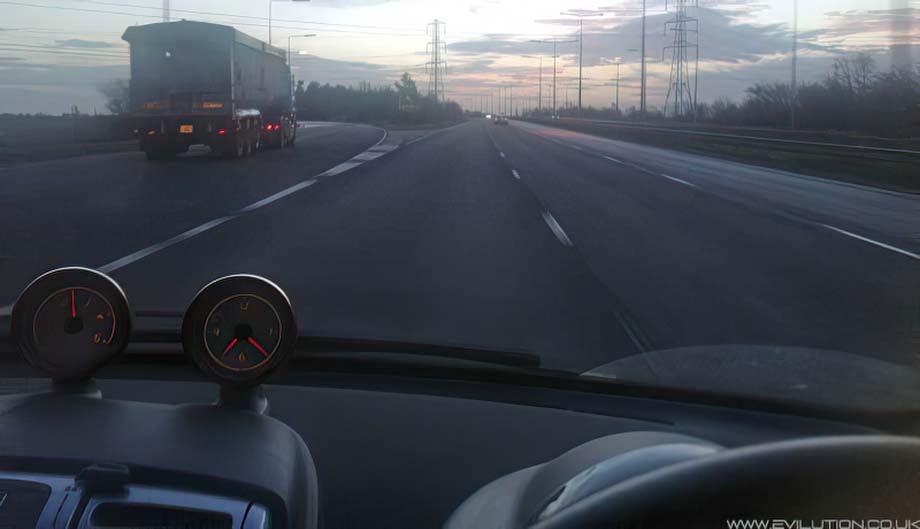
Compare that with a lower angle, the average brightness is less so the automatic contrast doesn’t make everything too dark. You simply don’t need to film the sky. Apart from planes and comets, there’s not much worth filming.
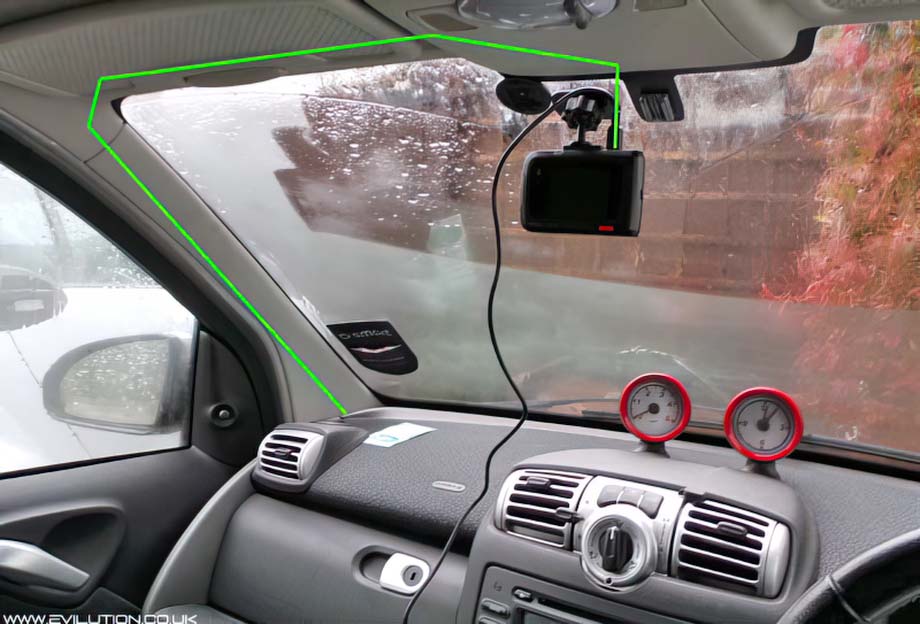
The DVR should be placed so the horizon is on or above the top 1/4 line shown in green below. It should be mounted as close to the centre of the car as possible and aimed straight forwards.
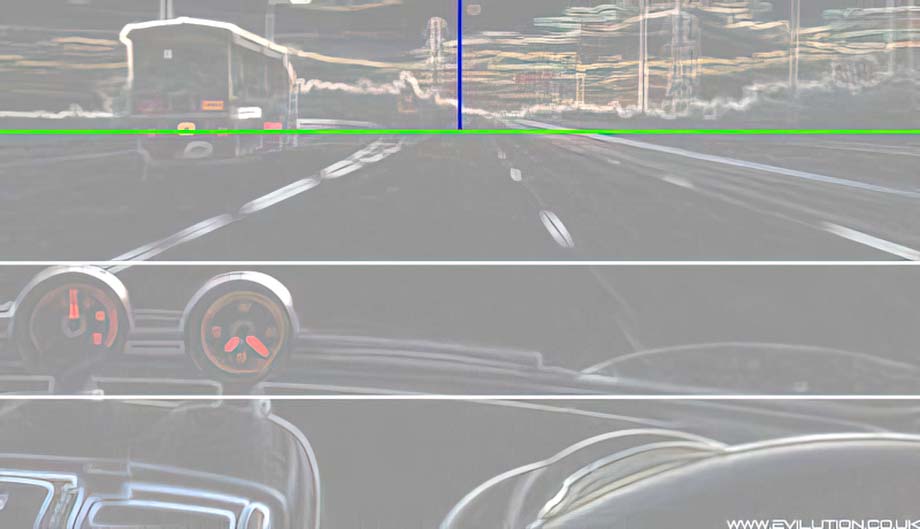
This makes it far easier for people viewing the video to work out the position of the car in relationship to the road and other road users in a case of an accident. It can also make your video files smaller! How? Variable bit rate
Variable Bit Rate
Most cameras use a temporal compression (interframe compression) which is a clever method of capturing video.
Essentially, the camera only really pays attention and properly encodes parts of the image that are moving. So, the parts of the dashboard that are the same for each frame are just duplicated from the previous frame. This duplication saves bit rate which allows for smaller video files and also allows the bit rate to be concentrated on the important area that you really want to see (ie, the idiots sharing the road with you).
This also helps a lot if you upload a dash cam video to YouTube as they limit the bit rate which can render full screen motion a little blocky. Both Dash cams and YouTube use the same sort of method for video compression.
The best explanation I have see for interframe compression is by legend, Tom Scott.
So, filming more dash and just the part of road that you actually need to see (and not vast swathes of sky) will improve the brightness, contrast, quality and reduce the size of your videos.
Placement
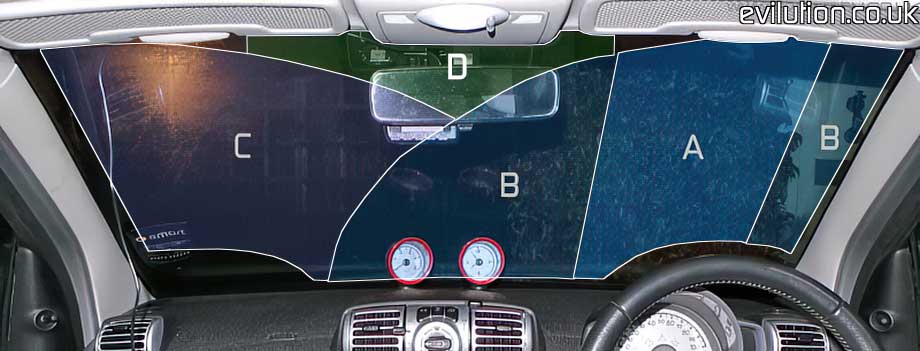
Where you put your camera is very important, not only for the best view of the road but for legality. The windscreen is divided into 4 zones. Zone A is a 290mm band running down the windscreen directly in front of the driver and within the arc of the windscreen wipers. Zone B is the remaining arc made by the driver’s wiper blade. Zone C is the arc created by the passenger wiper blade that isn’t covered by Zone B. Everything outside these zones is classed as Zone D.
You absolutely cannot have anything on the windscreen (permanent or temporary) in Zone A. You cannot have anything permanently attached to the windscreen in Zone B. You can stick whatever you want in Zone C and D.
I’d recommend sticking the mount in Zone D behind the rear view mirror and have the lens looking out of Zone C as seen here. It’s not recommended to have the camera look out a Zone D section as the wipers won’t clear that section of the windscreen so the footage may not be clear.
Take the car out for a drive and check the footage on your return. It is worth checking it on a large screen instead of viewing it on the DVR as you’ll get a better sense of image quality.