

Mod Description
Remaps are great but can be expensive so lets do it ourselves.Mod Details
PremiumNo Difficulty
 Mod ID443
CreditEvilution
Cost££40+
For
Mod ID443
CreditEvilution
Cost££40+
For
 Linkhttps://www.evilution.co.uk/mod/remap-diy.htm Copy to Clipboard
Any Help Or Info?
This is a fresh topic to me, I have grasped the basics and had a quick read up about it. As can be expected, remappers are very cagey about how it all works. If you can help or add any information to this them please contact me.
Important Info
It is vital that you know four things before you start:
You can’t just throw any old smart remap onto your car.
You could be breaking copyright laws
This isn’t the full story, it’s just a starter guide to get you thinking.
Someone has already followed this and killed his car.
What You Need
To remap your car (and anyone elses), you will need the following:
Windows Laptop
KWP2000 USB to K-line convertor.
Remapping software.
Remap code
Where To Get These Parts
Most people have a spare laptop, if you don’t, just ask about. Go to Ebay and type in KWP2000. You can buy preassembled units from £60 onwards but I bought mine from a seller called ‘tuning-concept’ in January 2007. It cost me £25 and £8 p&p, he still sells them at the time of writing this.
The remapping software and actual remaps are just as easy to get although illegal. Again on Ebay, type in ‘remap files’ and you will find a few people selling DVDs full of remap files and software. The remapping software will be hacked copies, the remap files will be someone elses property and therefore copyrighted. You have been warned.
Build Your Own KWP2000
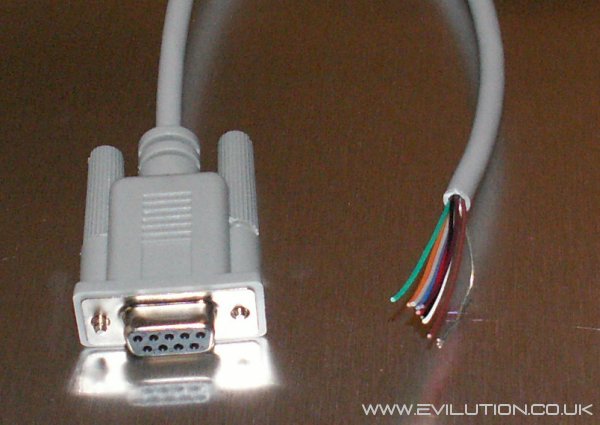
The unit I bought from ‘tuning-concept’ came with a PCB and an OBD plug. You need to supply a serial cable, 3 LEDs and a box to put it in. You’ll need a soldering iron too. This is the unit that I received, it has a USB to PC on the left and serial to OBD on the right.
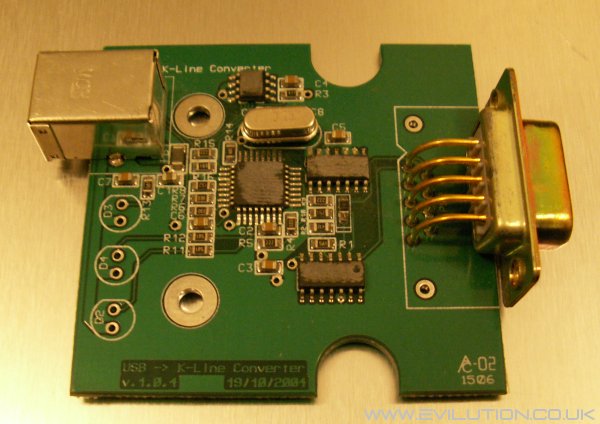
The board has spaces for 3 LEDs, almost any standard LED can be soldered in here. Note the flat edges on the 3 circles, these will tally with flat edges on the LEDs.
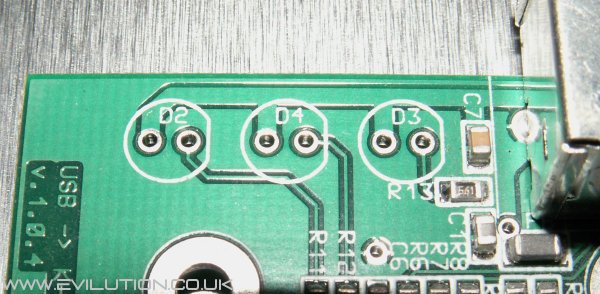
D2 = Transmit
D3 = Power
D4 = Receive

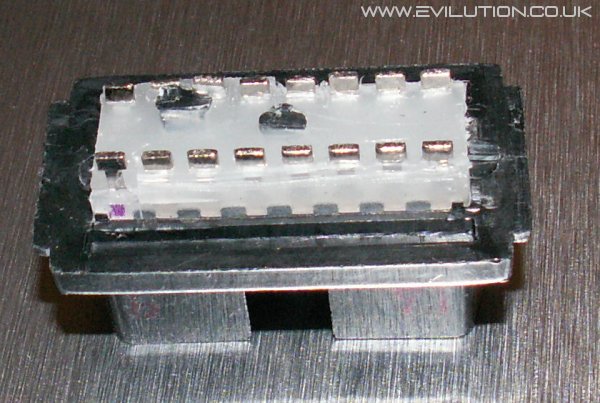
The OBD plug that comes in the kit is basic but useable.
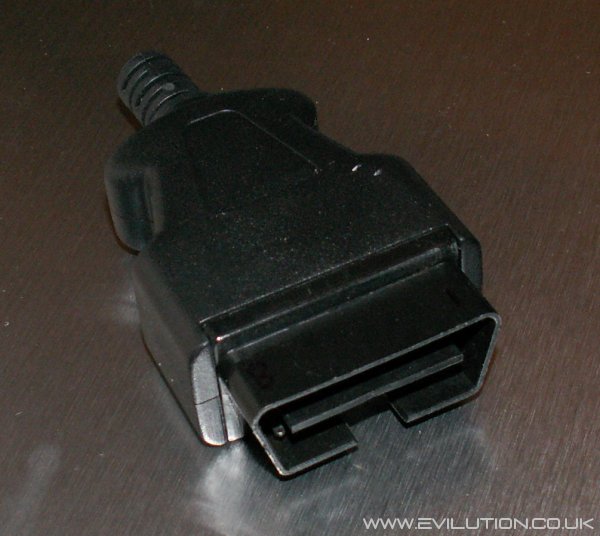
With the back off you can gain access to the pins of this budget part. I found it easier to work on after I trimmed back some of the white plastic.
A standard serial cable with a male plug is needed, cut the other end off.
You only need to attach 4 wires, don’t go by my colours.
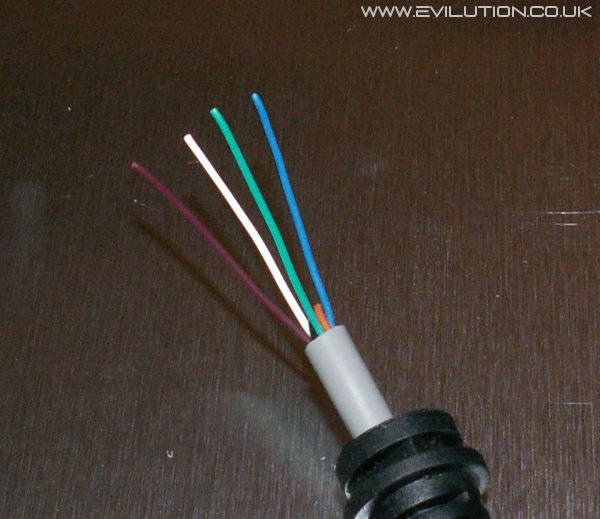
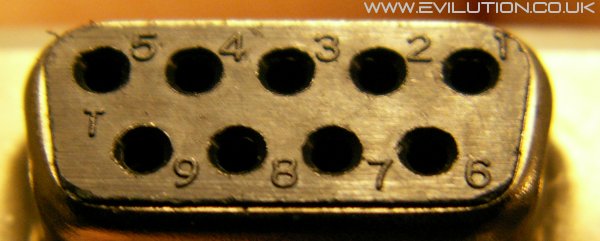
The serial plug is numbered at the end. You should connect:
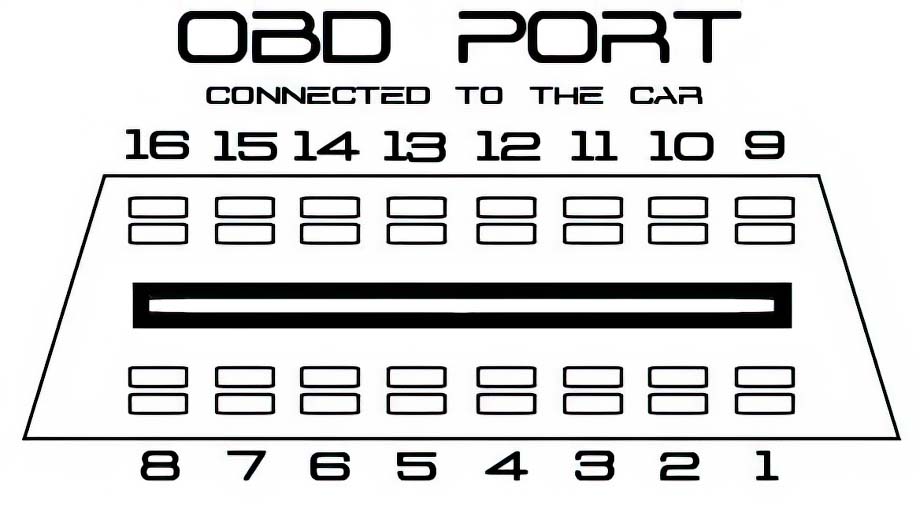
Serial plug Pin 6 to OBD pin 4 (earth)
Serial plug Pin 7 to OBD pin 5 (earth)
Serial plug Pin 9 to OBD pin 16 (12v)
Serial plug Pin 5 to OBD pin 7 (K-line)
Install it into a suitable box and the KWP2000 remapping unit is now completed.
Installing The Drivers
With the laptop running, plug the KWP2000 unit in via the USB cable. The laptop will discover the hardware and attempt to find the drivers. Take the DVD with the remap software on and insert it in the drive and tell the computer to search the DVD for drivers. Eventually it will discover the USB to K-line convertor driver and install it.
Remapping The Car
Go to the car and plug the OBD lead into the unit and start up the remapping software on the disc. You will get a list of car manufacturers on the left, click smart. At the top you will get the option on 600cc, 700cc, CDi or 1.3 Forfour (depending on software). Select the car you have and click connect.
There are conflicting rumours on reading from the ECU, there are some that say you can read and save the map you have in the ECU at the time. If you can do this, I would recommend it. If anything goes wrong you can just put your original back on.
Of course this also opens up the possibilty that you could copy your remap and install it on another car. Please don’t do this as you will be breaking the copyrights of the remap coder.
Look through the list of remaps, they tend to be repeated a bit on the DVDs and the information isn’t very clear but EDG and CDI tells you it’s for a diesel. It’s quite important that you find out what petrol engine you have, EU1, EU2, EU3 or EU4. Some remap file CDs class them under these headings to make the choice easier.
Select a remap file and upload it to the car. Go and test out the remap.
Warning
There is a risk when you flash anything, be it a car, firmware on a new DVD drive or a Sony PSP. I am not responsible if you kill your car. Make sure your car battery is ok, make sure the laptop battery is ok and you have no other programs running. Most importantly, make sure you pick a remap designed for your car.
Writing Your Own Remaps
Yes it is possible but not exactly easy. Search the internet for a remap editor. Load up a few remaps from the DVD and compare them to the originals, this will give you an insight as to what has changed. There are a few forums out there that will be able to help you to locate the addresses for the rev limiter, boost levels and fueling etc.
Remember, although remaps are copyrighted by the owners, you only need to change a few things to make it your own work as many of the figures in the remaps are from the original map in the car. Experiment if you have the balls.
Grab all your friend’s remaps and compare them against each other and the original. As long as you don’t start applying them to other cars you should be OK. Don’t ever remap someone else’s car unless you own the remap. Don’t ever charge to remap someone else’s car unless you own the remap. If you do write your own, please don’t charge too much to others.